

How To Restore Old Files On Windows 10
This commodity details eight tried-and-tested methods to recover deleted files on Windows 10. It's almost guaranteed that at least one of those methods will help you get your information dorsum. See the Quick Navigation section below for an overview of common information loss situations and applicable recovery methods.
Spring to:
- Undelete Files on Windows 10 Using Third-party Data Recovery Software
- Pull Windows x Lost Data Out Of (File) History
Losing your precious information is piece of cake. One absent-minded-minded click and your files will be gone quicker than a coin in a magic play tricks. Thankfully, there are several ways to restore deleted files on Windows 10. It's almost guaranteed that at least ane of those methods will aid you lot get your data back.
If you deleted your files and don't accept backups bachelor, you should avoid actively using your reckoner. Your files' recovery should be your immediate next motion to minimize the chances of newer information overwriting them.
Quick Navigation
| Trouble | Solution |
|---|---|
| I just deleted a file accidentally. Can I disengage my action? | Look in the Bin Quick Car-Rescue from the Bin with CTRL+Z |
| I've permanently deleted a file – manually removed it from the Recycle Bin. Can I still go it back? | Software to the Rescue There's an App for That – Windows File Recovery Backup and Restore - In Windows 10 |
| I clicked something in Explorer, and my files disappeared. How exercise I get them dorsum? | Look in the Bin Hidden Files, Garbled Filesystems Software to the Rescue |
| My computer is slow and my files disappeared/are inaccessible | Hidden Files, Garbled Filesystems |
| I made changes to a file and saved it. Can I somehow undo them? | In that location's an App for That – Windows File Recovery History Trip Backup and Restore - In Windows 10 |
| A secondary storage device with all my work files disappeared! | Hidden Files, Garbled Filesystems There's an App for That – Windows File Recovery Software to the Rescue Backup and Restore - In Windows 10 Organization Epitome File Extraction |
| My computer won't boot. The OS and files are inaccessible. | Backup and Restore - In Windows 10 System Paradigm File Extraction |
| I formatted an HDD only forgot to fill-in my files! What now? | Software to the Rescue Fill-in and Restore - In Windows 10 Organization Image File Extraction |
viii All-time Methods to Recover Deleted Files on Windows ten
Here's a super-quick method to recover deleted files on Windows 10:
- Download & install Disk Drill on your Windows 10 PC.
- Open Disk Drill & select the device yous desire to scan.
- Click "Search for Lost Data" to start the scan.
- Preview & select the lost files and click "Recover".
- Choose a safety recovery destination and ostend.
Method #i: Restore Deleted Files From the Windows 10 Recycle Bin
Nigh users delete files past selecting them and and so either right-clicking and choosing Delete or hitting Delete on the keyboard. On modern operating systems like Windows 10, this doesn't erase a file. It moves it to the Recycle Bin. If you lot act immediately, undoing that fault tin be like shooting fish in a barrel.
- Open the recycle bin. You tin do it by either right-clicking on its icon and choosing that selection (open) or double-clicking on it.
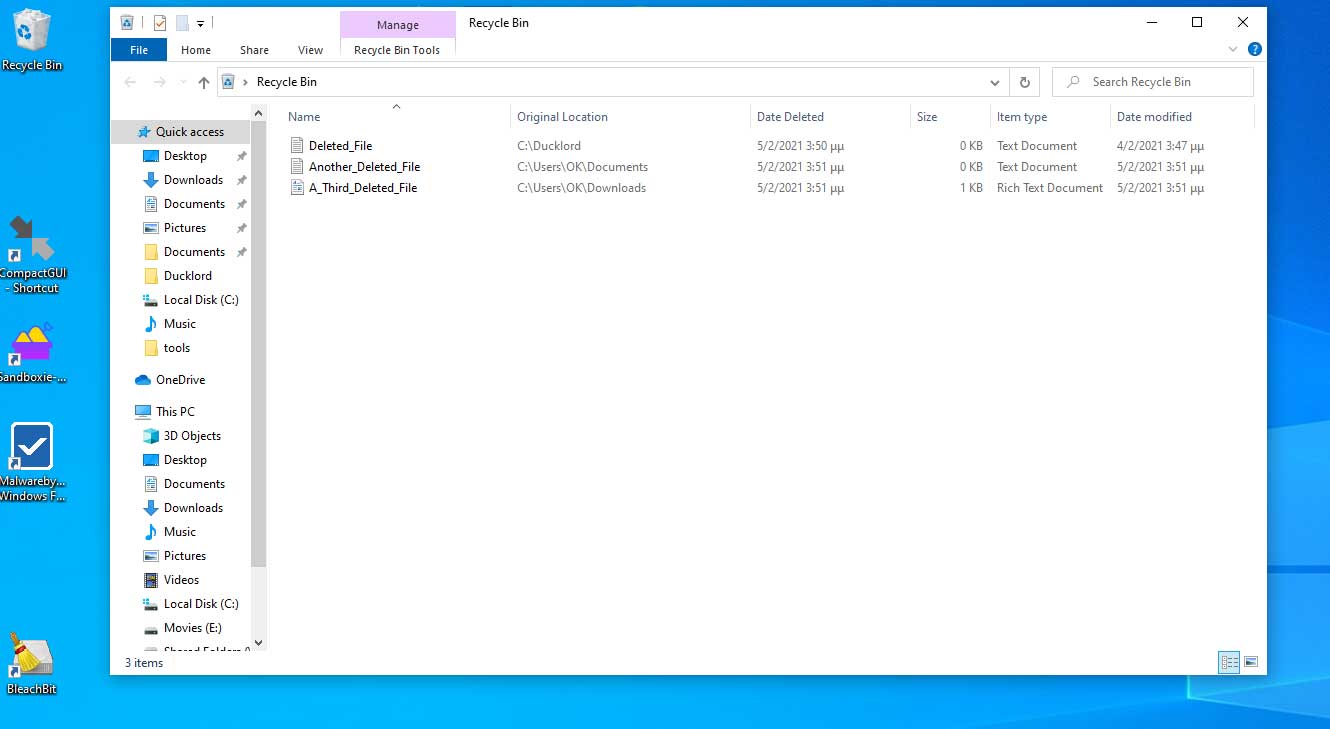
- Locate the file you desire to save from its impending deletion.
- Right-click on it and choose Restore from the pop-up menu that appears.
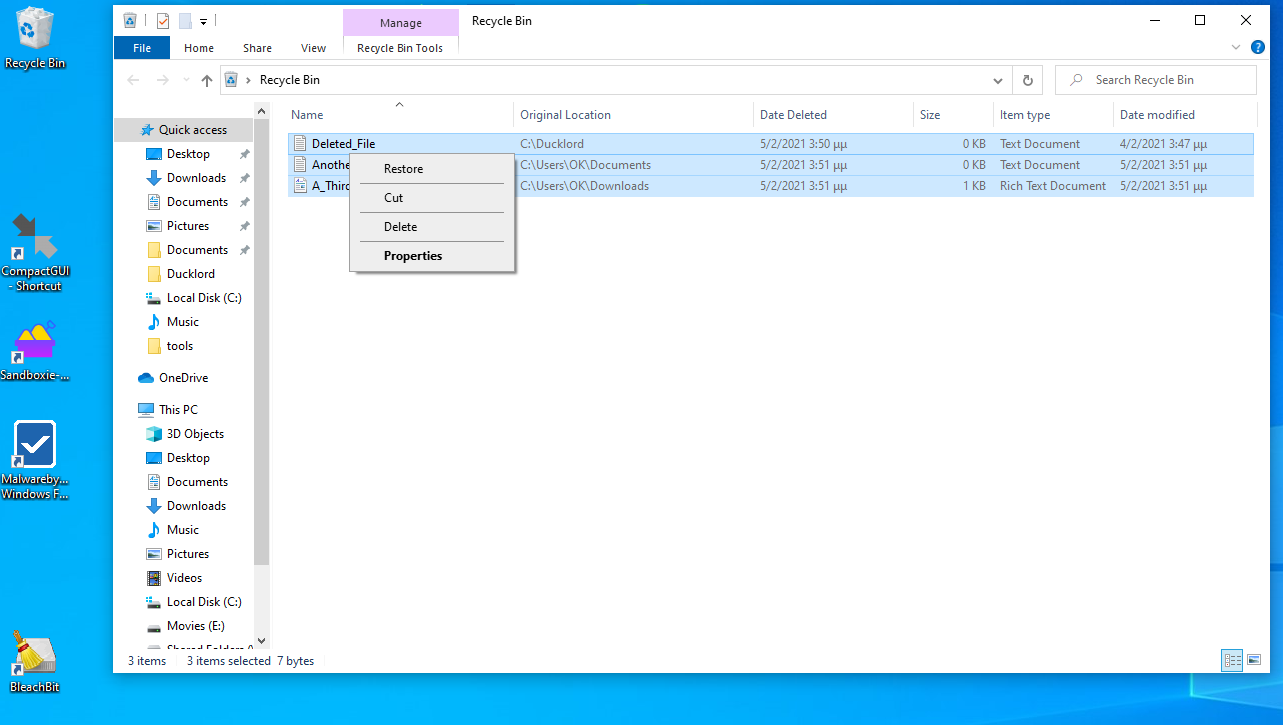
To restore multiple files, keep CTRL or Shift pressed on your keyboard while clicking on them.
After that, your files will move from the Recycle Bin back to their original location.
Method #2: Rapidly Auto-Recover Deleted Files From Windows 10's Recycle Bin With CTRL+Z
There's an even easier mode to get your files back from the Recycle Bin than the process to a higher place. Yet, y'all should merely apply it right after deleting a file, and simply if:
- You are all the same in the Windows Explorer window from where you deleted the file.
- You are absolutely certain it was moved to the recycle bin.
To become your file back, printing CTRL + Z, and hey presto, it will be back where it originally was. At least, theoretically.
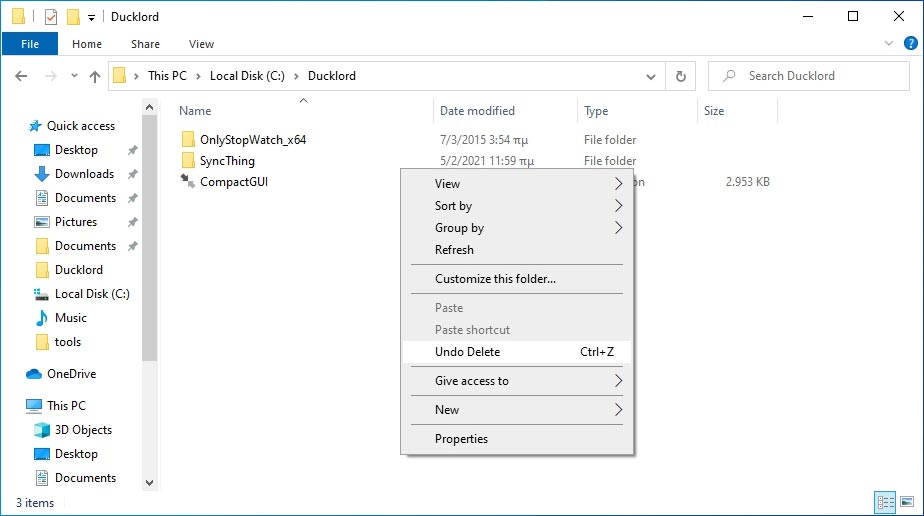
Practically, this isn't some magical shortcut that brings files back from the dead, but a command to undo your final activeness. In Windows from Build 19041/Version 2004 onward, Microsoft decided to nowadays information technology as a file-saving solution. If y'all right-click on a blank spot of the Windows Explorer window from where y'all deleted a file, you'll see the option to Undo Delete on the menu that pops upwards.
To check out how much information your Recycle Bin can hold, right-click on its icon on your desktop and cull Properties. You tin also increment your Recycle Bin'southward size from that spot.
Method #3: Bring Back Hidden Files and Ready Garbled Filesystems on Windows x
Sometimes you may not lose your files because of a deletion, but instead, lose access to them. A virus infection, a filesystem corruption, or another problem can render them invisible or inaccessible. Depending on the type of trouble, ii command-line tools might help you lot regain access to your files: chkdsk and attrib.
⬛ chkdsk
Did a power failure or an unexpected restart corrupt your filesystem? Chkdsk can help restore it to its quondam glory.
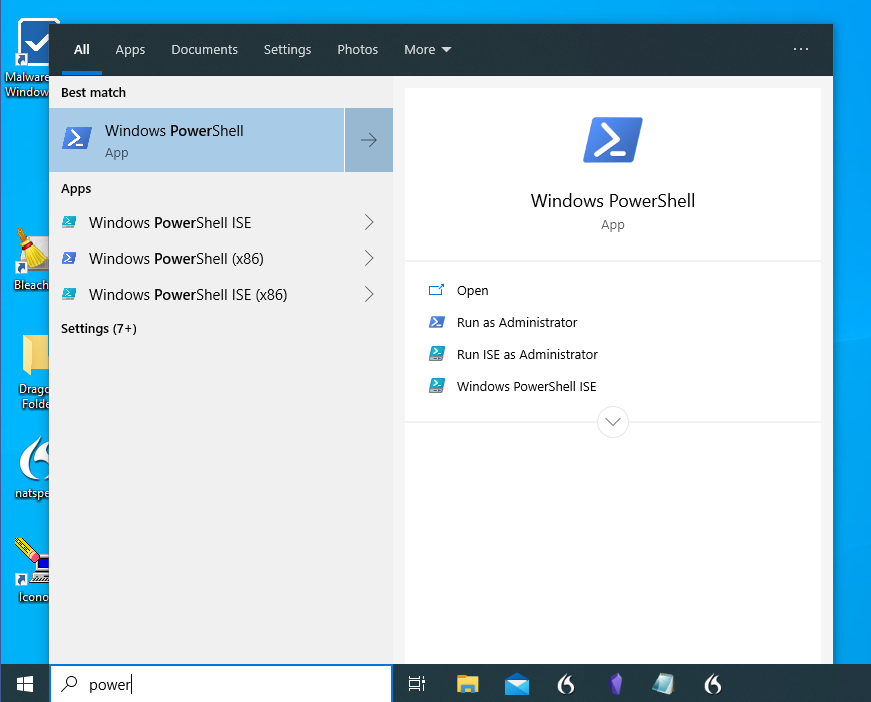
- Press Windows Key + X to access a quick card of Windows tools. From there, cull Windows PowerShell (Admin). Alternatively, you can printing the Windows central or click on the start button. And then, type "cmd" or "PowerShell", right-click on the 1 you prefer, and choose "Run equally administrator".
- To bank check the active deejay'south file system for errors and, if found, fix them, type "chkdsk /f" (without the quotation marks).
To browse a unlike storage device with chkdsk, state its letter afterwards the command itself, as "chkdsk D: /f" to check the bulldoze with the letter D, "chkdsk Q: /f" for the drive with the letter Q, and so on. - Chkdsk needs to lock the device it'southward checking to exercise its thing. Yous won't be able to access any files on this device while the procedure is running. It's also impossible to bank check and set the storage device where Windows 10 is installed while actively using the OS. If you demand to check that disk, chkdsk volition suggest scheduling the scan for the next reboot.
- Are yous suspecting that the file system corruption source is a failing storage device? Then, replace the "/f" parameter with "/r". This would make the command await similar "chkdsk D: /r" for the drive with the letter D and "chkdsk Q: /r" for the drive with the letter Q. The "/r" parameter works the aforementioned as "/f" but also checks for physical disk errors, locates bad sectors, and tin recover readable information from them.
⬛ attrib
Unlike what others may claim, attrib isn't a file recovery tool. Instead, it provides admission to almost the same options you'd see if you lot'd correct-clicked on a file and chose Properties. With information technology, you tin change a file's flags to set it as subconscious, read-only, archive, or equally a system file.
Still, later a serious tour of filesystem abuse, or another trouble, your files might finish upwardly with the wrong flags. To fix them, run control prompt (CMD) or PowerShell as an administrator, as we saw above. When in that location, use the attrib command equally follows:
- To mark a file as subconscious (+h), read-only (+r), archive (+a), or organization-related (+s), type:
attrib +h +r +a +due south FILENAME
- When dealing with "lost" files, you'd probably desire to practice the opposite. To mark them as non subconscious/read-only/archives, and surely non system-related. Thus, you should replace the pluses with minuses to instead remove those flags. In that example, the command would turn to:
attrib -h -r -a -s FILENAME

- Do you want to remove those flags from many files at once? You can run attrib with the "/s" and "/d" parameters. The first one ("/s") instructs attrib to apply your setting to all files in the active directory, recursively. The second one ("/d") tells attrib to besides "bear upon" directories.
Note that you shouldn't randomly change the settings of files about which y'all know nothing. Nor should you ever run a batch command at the root of the storage device with your active operating organization. Those could lead to further problems, the solutions to which would demand a wholly different guide.
Thanks to those ii nifty tools that come with Windows, regaining access to your lost files might exist a single control away. All the same, if your files were really deleted, you'll have to look into i of the solutions that follow instead.
Method #four: Windows File Recovery: Microsoft's Official Windows 10 File Recovery Solution
If you are on 1 of the latest versions of Windows (Version 2004 or newer), y'all can use Windows File Recovery. It'southward another command-line tool, which you will have to use through Powershell or the command prompt. Notwithstanding, it's a pretty straightforward affair.
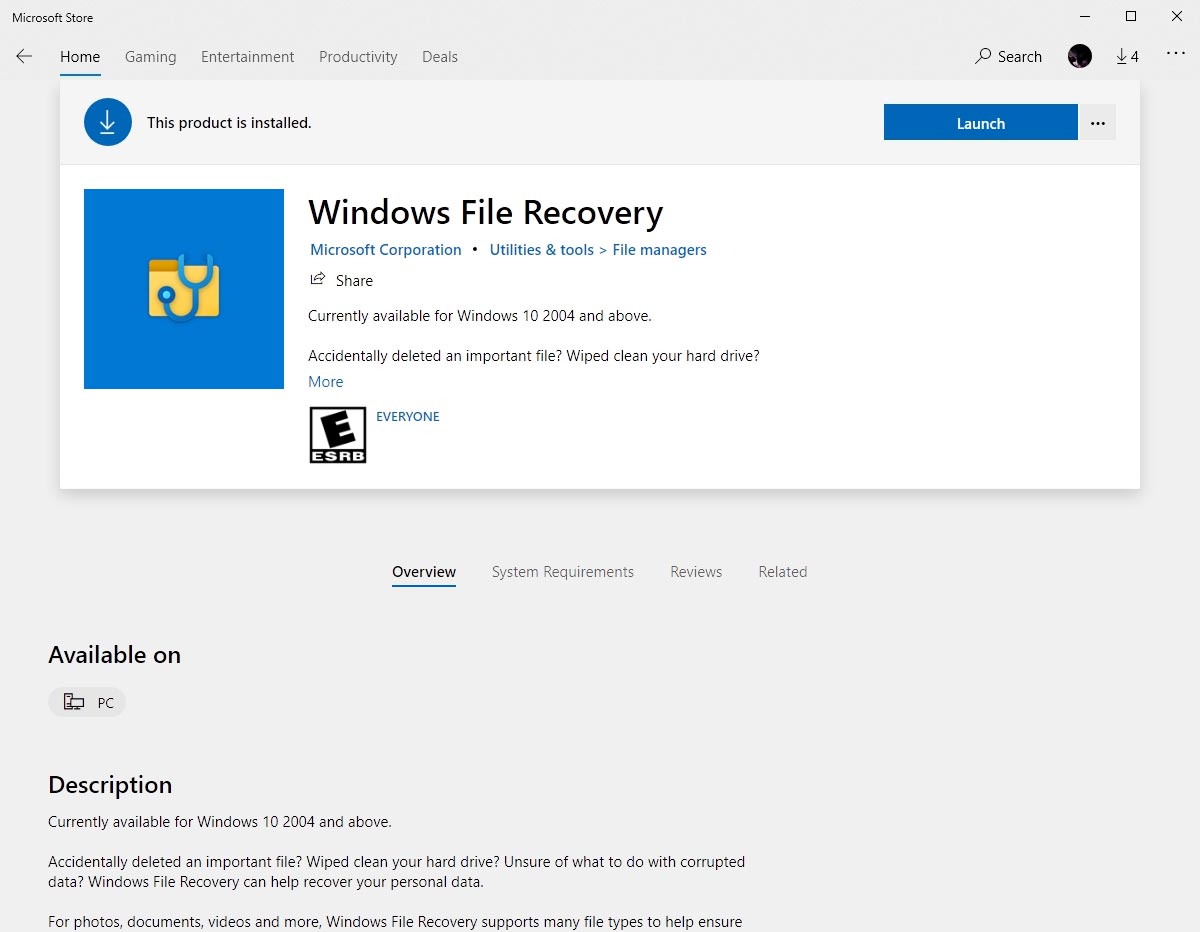
- Press the Windows key and showtime typing "Store". So, cull the Microsoft Store entry that appears. When there, perform a search for "Windows File Recovery". Click the "Install" button to get the application.
- Open either PowerShell or the Command Prompt with administrative privileges, as we saw earlier.
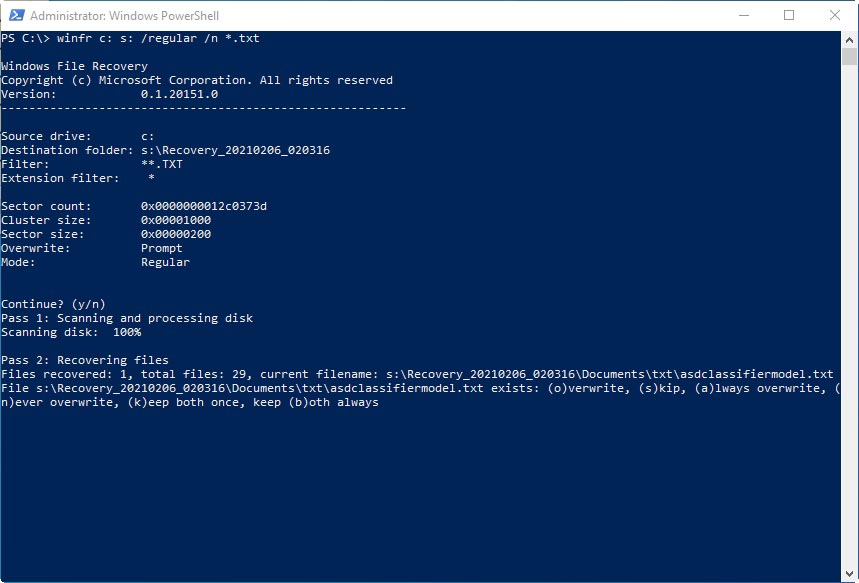
- If you're trying to restore files from a non-corrupted NTFS drive, type:
winfr SOURCE_DRIVE DESTINATION_DRIVE /regular
An bodily version of the command to recover files from the system drive "C" to a backup drive "J" would be:
winfr C: J: /regular
If that command doesn't lead to the results you wanted, or you are dealing with a corrupted disk, swap the operating fashion from "/regular" to "/extensive".
- Practise y'all want to recover just files of a specific file blazon? Add together "/northward *.FILE_EXTENSION" at the terminate of the command to a higher place. For example, to undelete your lost TXT, Physician, and PDF files from drive "D" to drive "Q", y'all could type:
winfr D: Q: /extensive /n *.txt /n *.doc /n *.pdf
- The above commands automatically create a recovery directory. You'll find it in the specified target bulldoze, with the time and appointment in its proper name. You can specify the recovery directory's name by stating a total target path instead of merely a drive letter. This would expect like:
winfr C: E:\RecoverDir
In this particular example, "RecoverDir" is the name of a folder in the "E" drive.
- Winfr also offers two more advanced modes for recovering files: segment and signature mode. Yous can choose the first ane by adding an "/r" switch and the 2d with "/10". Unlike the default mode, they don't rely on the hard drive's Primary Boot Record (MBR) and tin can recover more files. However, signature mode can only recover a small grouping of filetypes, similar images stored equally JPG or PNG files. To bank check out the supported filetypes, use the command "winfr /#" (without quotation marks).
Still, Windows File Recovery is a somewhat restricted tool and sometimes manages to restore everything but the files you wanted. That's when it'due south worth trying a third-party solution.
Method #v: Undelete Files on Windows 10 Using Third-political party Data Recovery Software
Didn't Microsoft's Windows File Recovery bring back the files you wanted? That'due south when information technology'southward time to endeavour a more established solution. We usually become for Disk Drill, which combines powerful recovery algorithms with outstanding ease-of-employ.
Disk Drill is likewise bachelor for Macs, and can scan Android phones and iOS devices when connected to your calculator. For this guide, though, we'll be using it on Windows 10, to recover files lost on a PC.
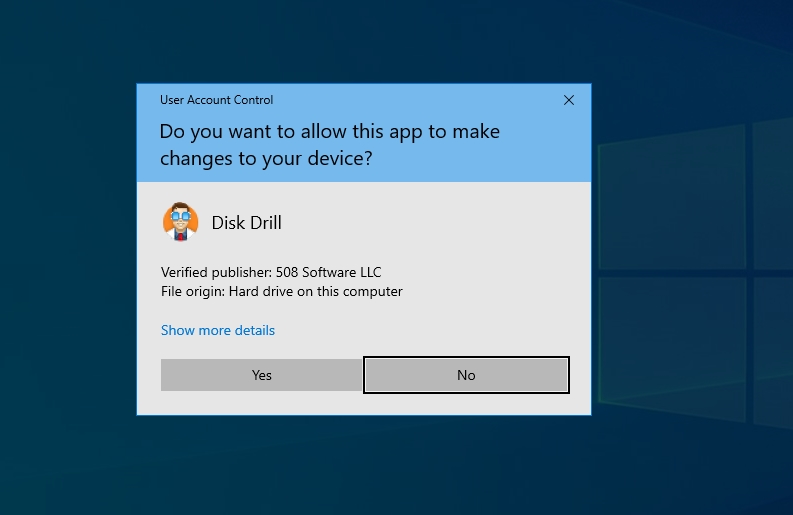
- Visit Disk Drill'south official site. From there, download and install the awarding. Then, run it, and answer positively when asked if you want to let it to make changes to your device.
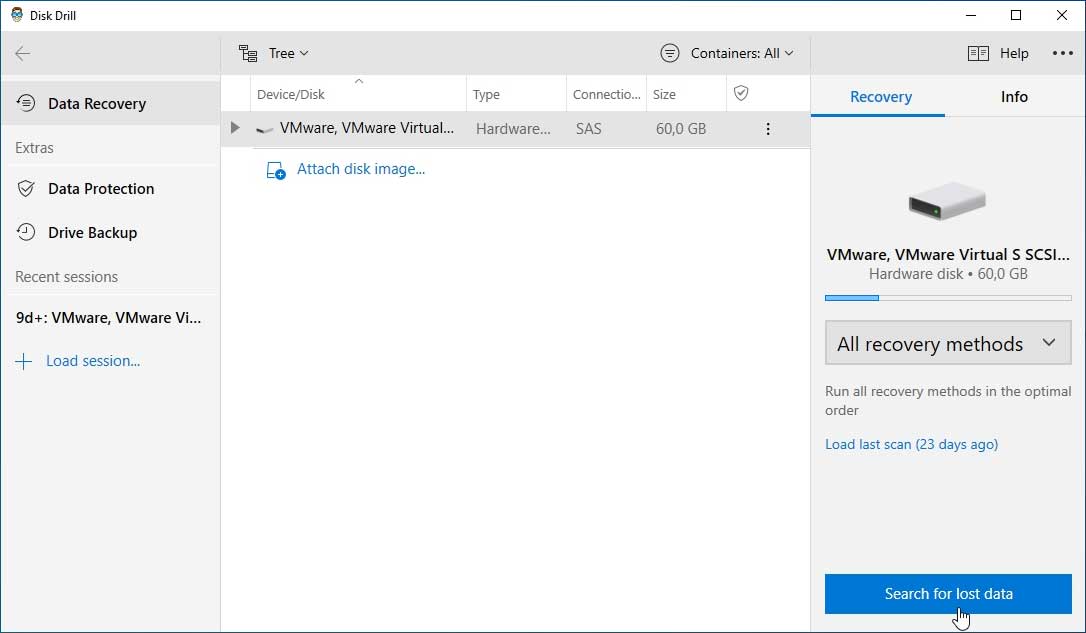
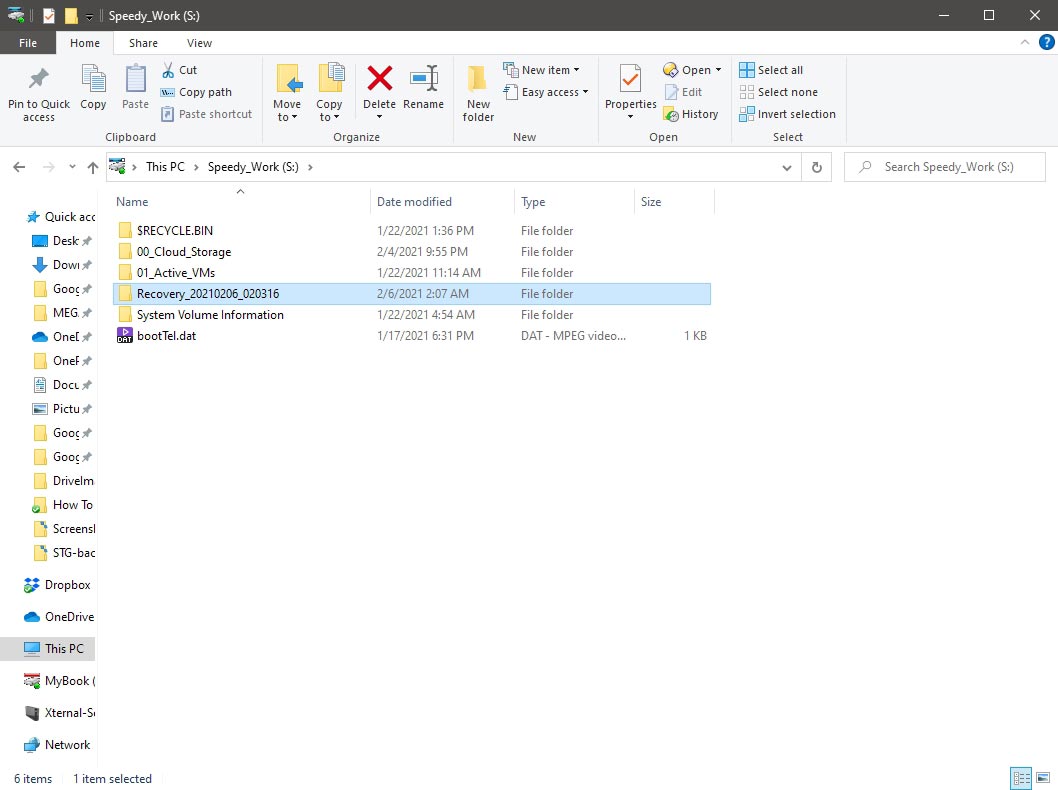
- Choose the storage device you want to scan for lost files from the master listing at the eye of Deejay Drill'south window. You might have more one on your estimator. Then, click on "Search for lost data" at the bottom right.
- Deejay Drill volition immediately start scanning your storage device. It will also present a summary of the lost files information technology's located and can recover, updated in realtime. You can check them out while the process is still underway by clicking on "Review found items" at the peak correct.
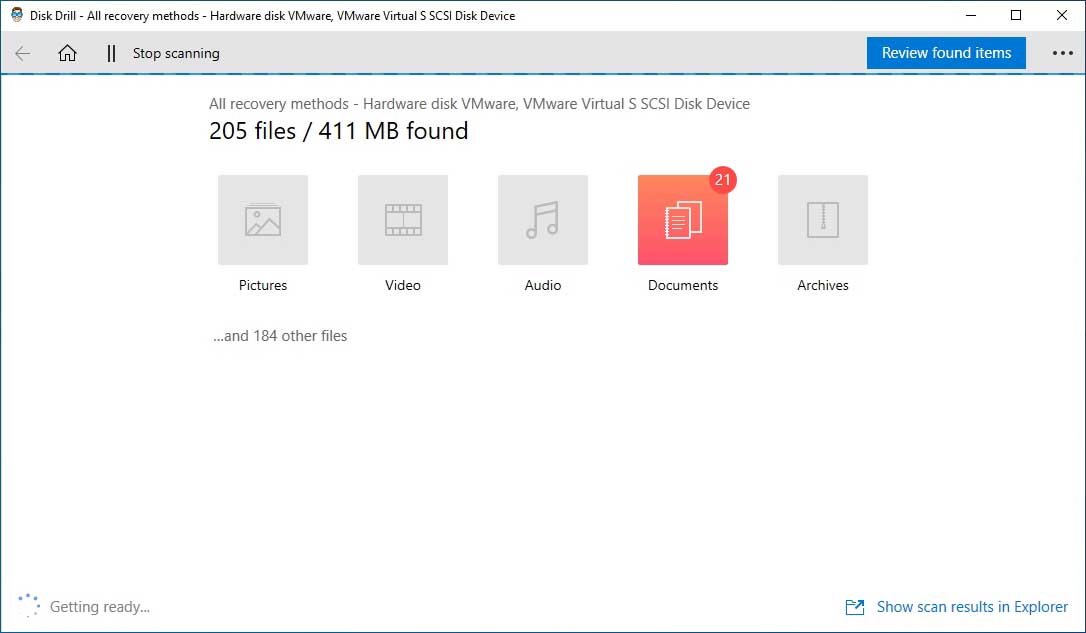
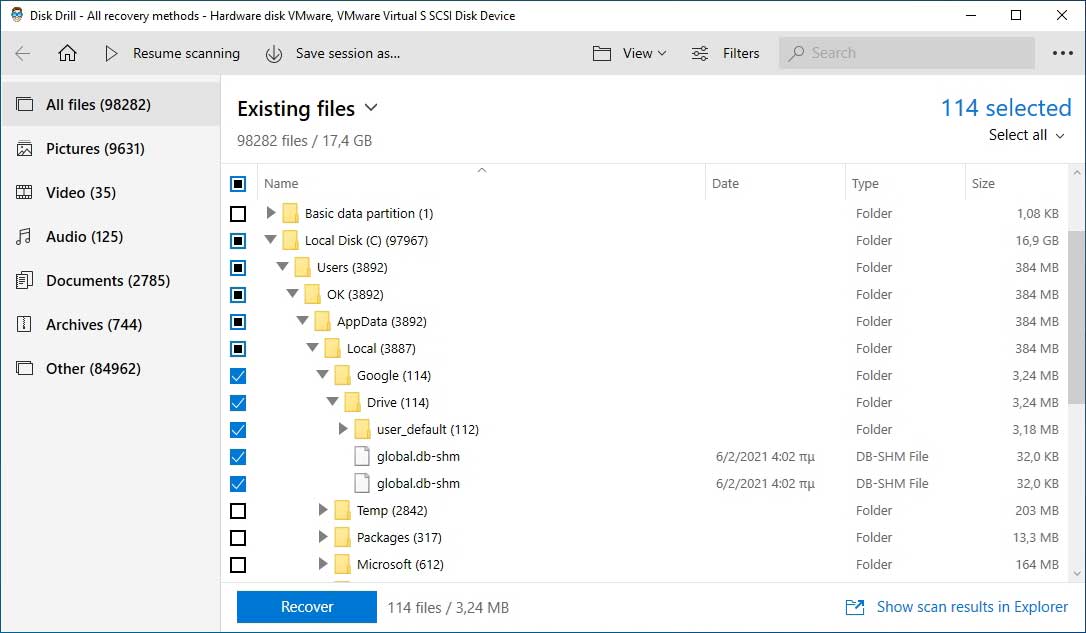
- Did Disk Drill find the files you want to recover before the scanning process completed? You lot can stop the scanning process by clicking on "Stop scanning" on the superlative left of the window. Then, keep with their recovery. Look at the listing of found files and "tick" on the left of the ones you want recovered. If they're not amidst the results, give Deejay Drill'due south scanning some more fourth dimension. Note that you can resume the scanning procedure if you've stopped it.

- Stop the scanning process and choose the files you want to recover. A blue "Recover" button will be enabled on the bottom left of Disk Drill'south window. Click on it to move to the next pace.
- Deejay Drill will ask yous where you lot want to salve your files. It's meliorate to choose a dissimilar device than the i from which yous're trying to recover your lost data.
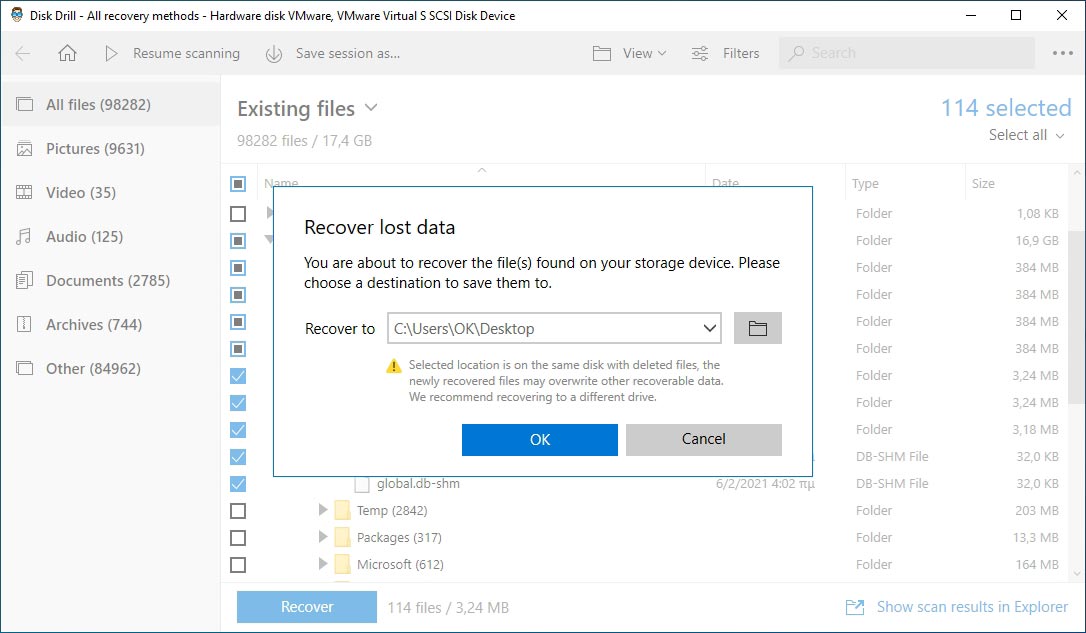
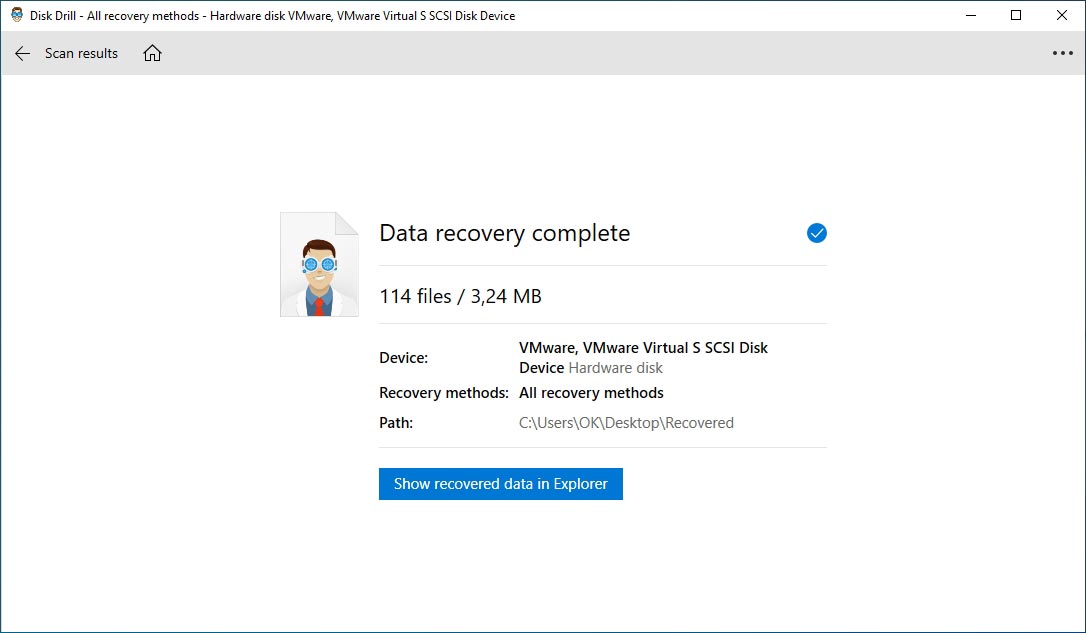
- Soon after, Disk Drill will inform y'all that the recovery process is complete. Information technology will offer the option to check out the recovered files in Windows Explorer.
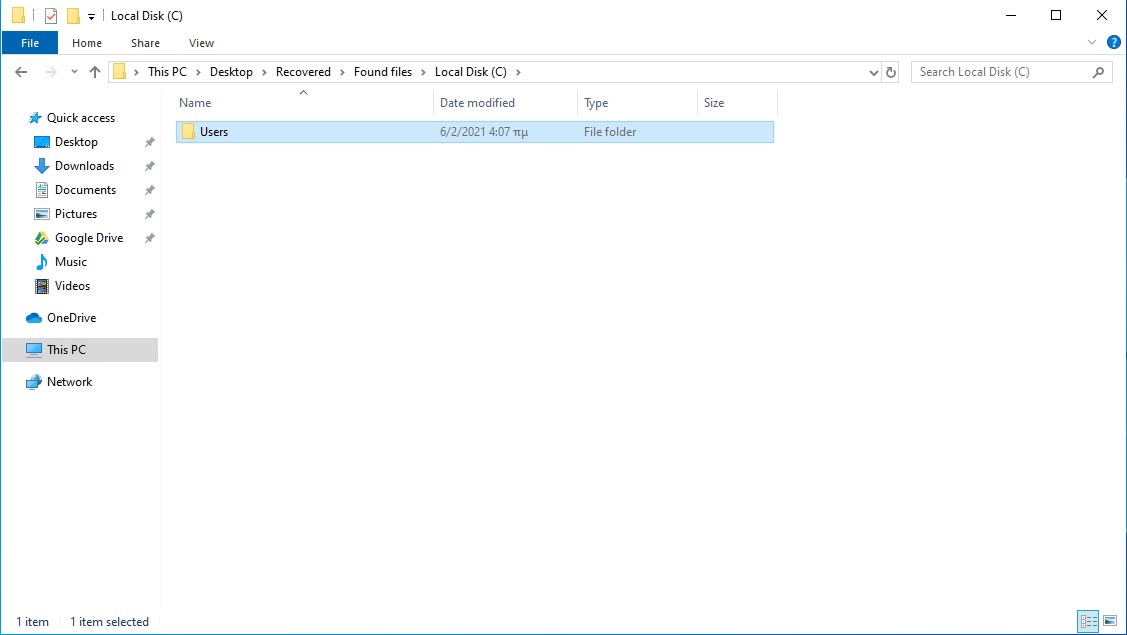
- Deejay Drill will take also kept your recovered files' binder construction. Thus, you might have to wait into the results folder's subfolders to find them.
Despite Disk Drill'due south impressive results, it'southward improve to be prepared. Another way to put this would exist "information technology's better to proceed backups". Thankfully, Microsoft equipped their latest Os with many fill-in solutions, through which you can recover deleted files on Windows 10.
Method #half-dozen: Pull Windows x Lost Information Out Of (File) History
Out of all the backup solutions included with Windows 10, File History is the one specializing in securing your personal files. Notwithstanding, as with all backup solutions, to recover your lost data on Windows ten using it, yous must have first ready information technology up.
File History is best used with an external storage device, similar a USB flash bulldoze or an external hard disk. Nosotros suggest you lot use ane with ample space to hold multiple versions of your personal files.
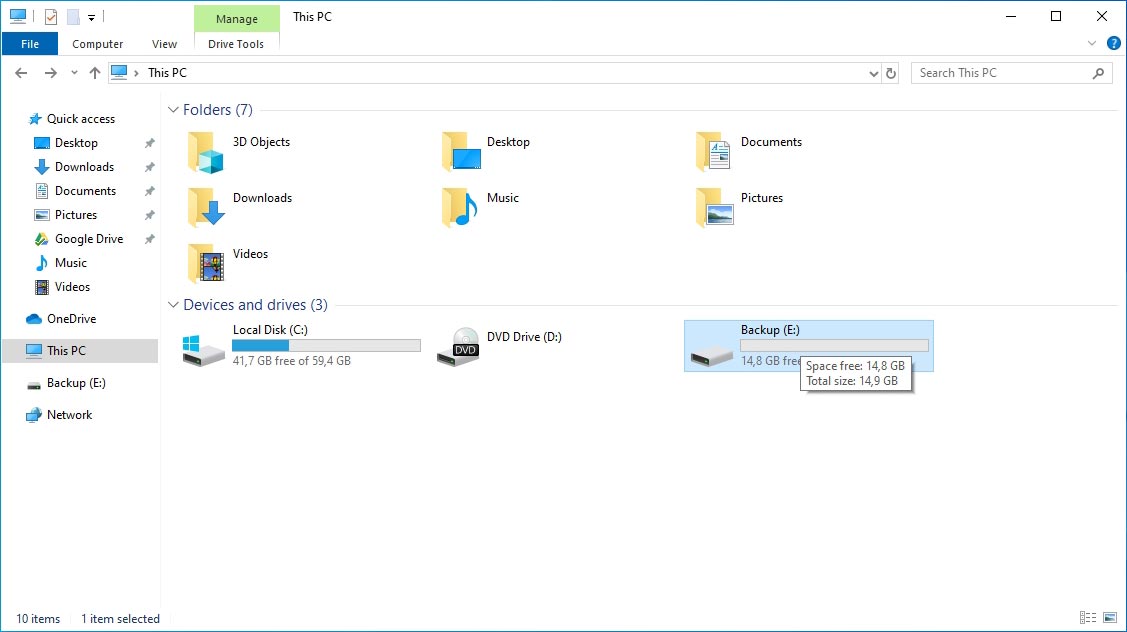
- File History relies on a secondary storage device. Thus, the first step is connecting said device and ensuring it'southward accessible and writable. For this guide, we'll use a 16 GB USB flash bulldoze.
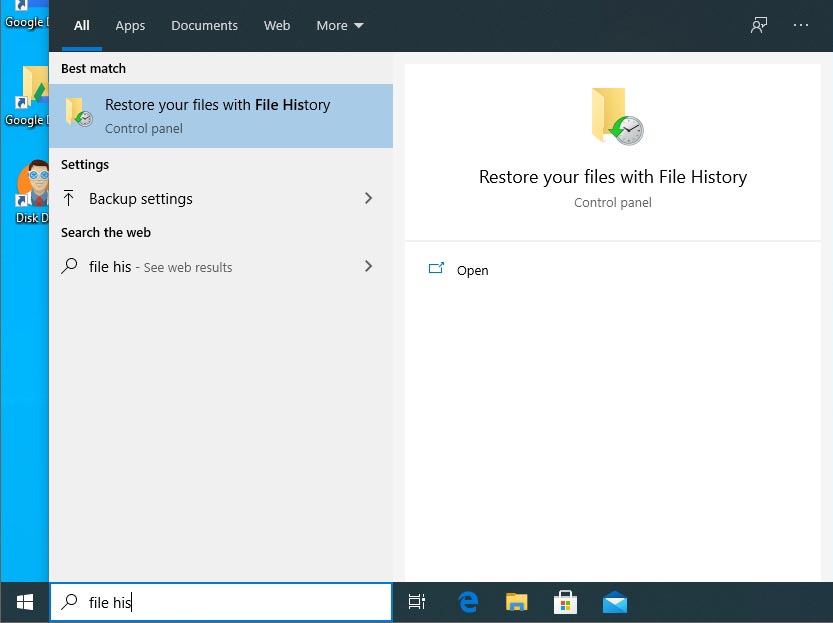
- Locate the File History options. To do that, either click on the start bill of fare push, or press the Windows key on your keyboard, and offset typing "file history". When "Restore your files with File History" shows up, click on it.
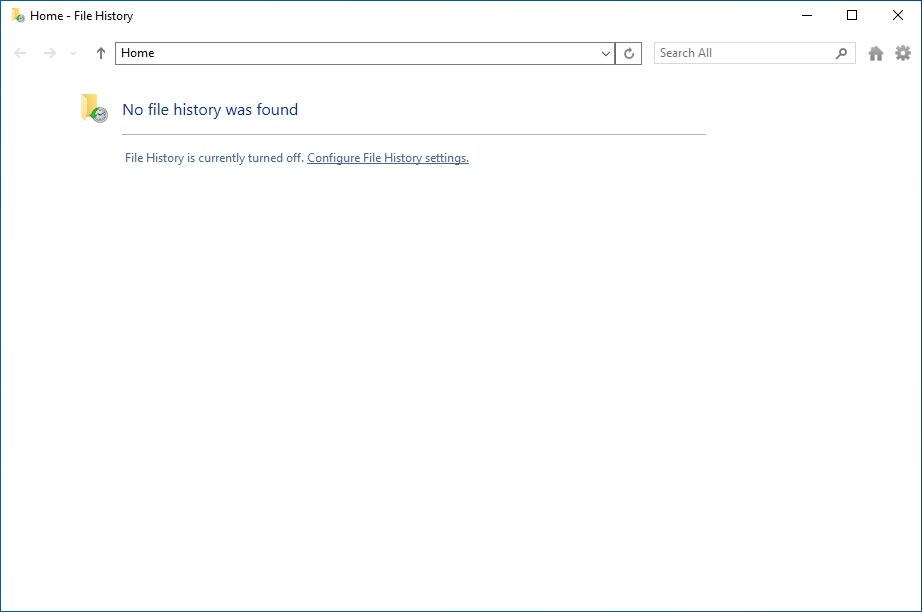
- File History will greet you with a blank folio since information technology'southward non enabled yet. Click on the underlined "Configure File History settings".
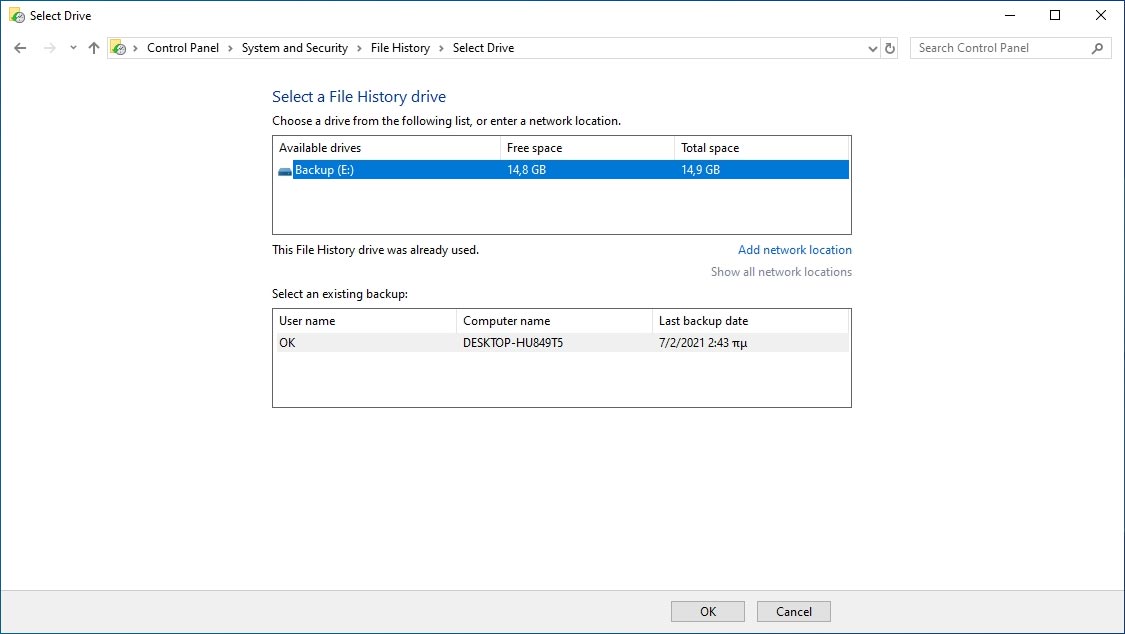
- File History volition ask you to select a drive where information technology will store its backups. You tin choose a drive from its listing or select a network location – like a shared folder on another PC or a network bulldoze. If you go for a network-accessible target, you should make sure that it's e'er available for File History to salvage its backups. Avoid choosing something like another family member's laptop that randomly turns on and off throughout the twenty-four hour period.
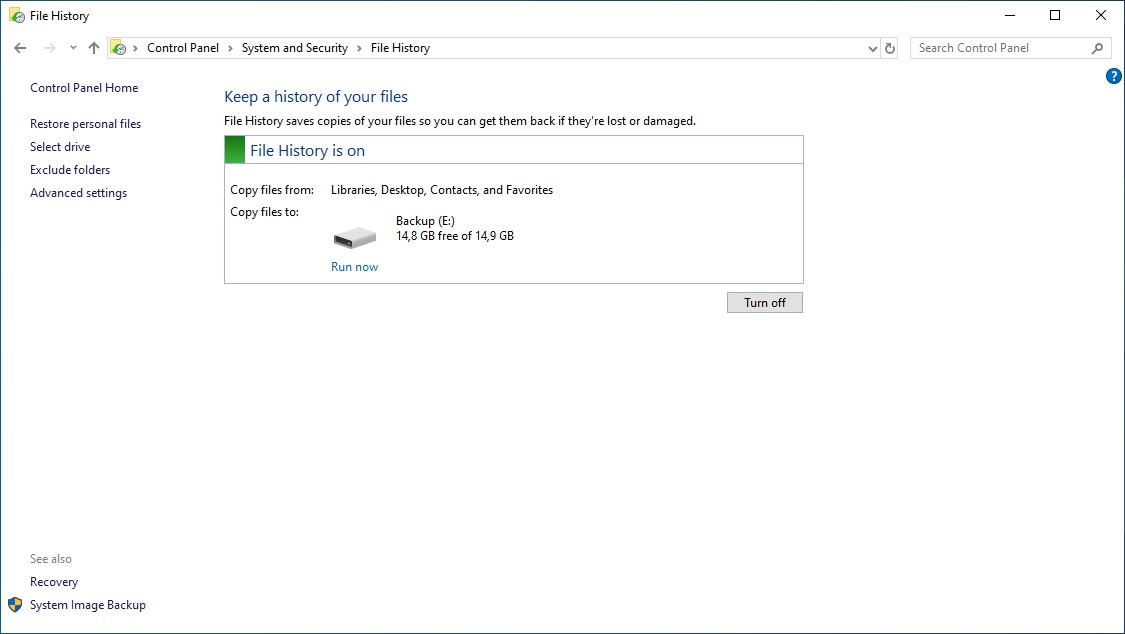
- File History will report that it'south turned on and using the target drive you selected. Even so, your files won't be safe yet. File History will currently incorporate zero backups and won't create one until it detects changes to your files. Thus, it's better to create the first backup manually. Practise that by clicking on the minor blueish "Run now" under your drive's icon.
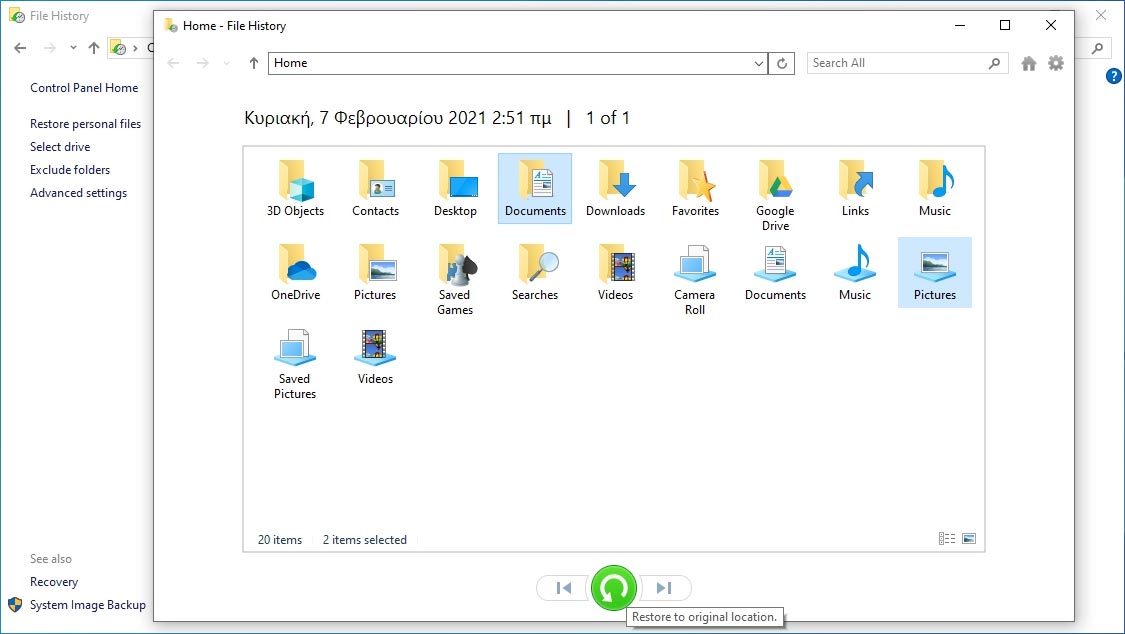
- With backups bachelor, restoring your files from File History is easy. Return to File History's chief page and click on "Restore personal files" from the menu on the left. File History will show yous the contents of its latest snapshot. At the bottom of the window, two buttons for back and forward allow you to motion between snapshots, offer admission to dissimilar versions of your files.
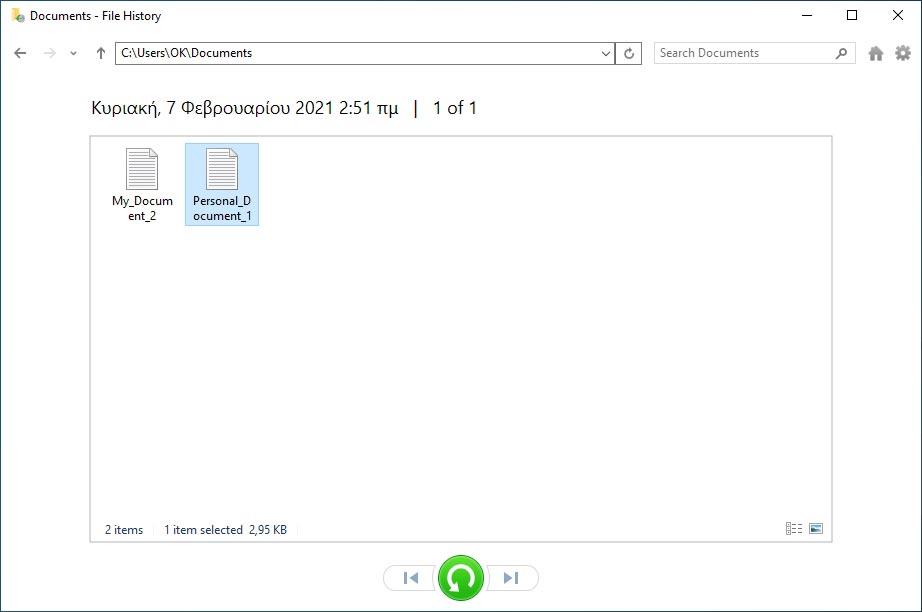
- You don't have to recover everything from a snapshot. You can selectively choose files and folders past keeping the CTRL key pressed while clicking on them. And so, click on that big, friendly, light-green push at the lesser of the window to initiate the recovery process. When it completes, you will observe your files dorsum at their original location.
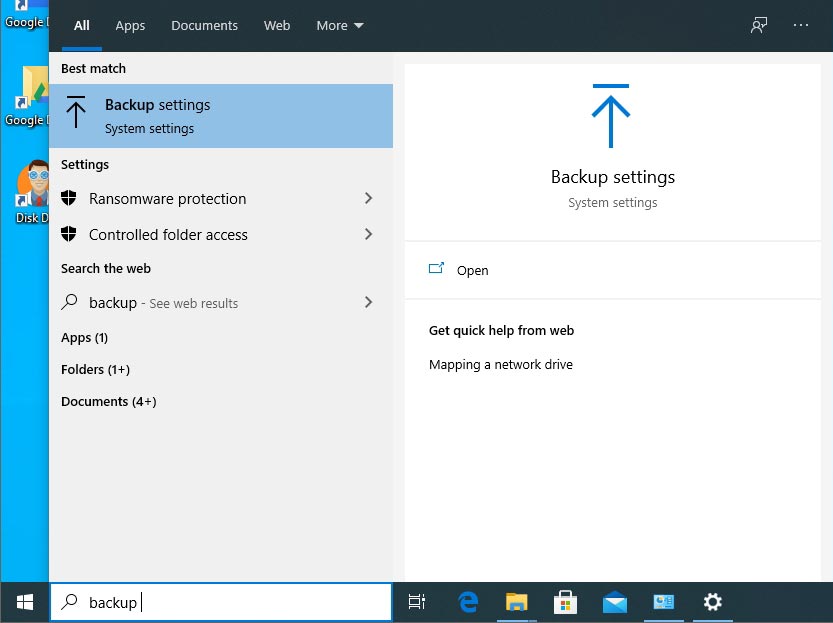
- You tin can add more folders to File History apart from the default ones. Even so, keeping up with Microsoft's tradition of unnecessarily complicating things, that's done from a wholly different menu. Click on the start button or press the Windows central and starting time typing "Backup settings". Choose that entry when it shows upwards.
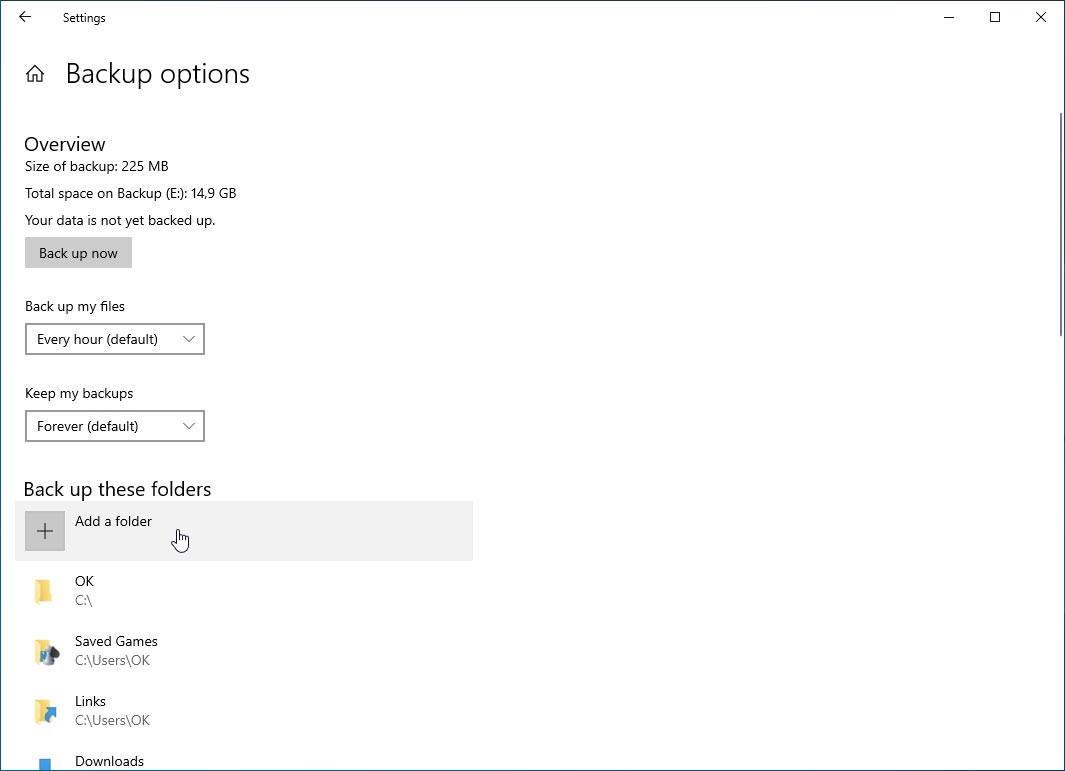
- Enable "Automatically fill-in my files" if it's not already set to On. Then click on "More than options" directly underneath.
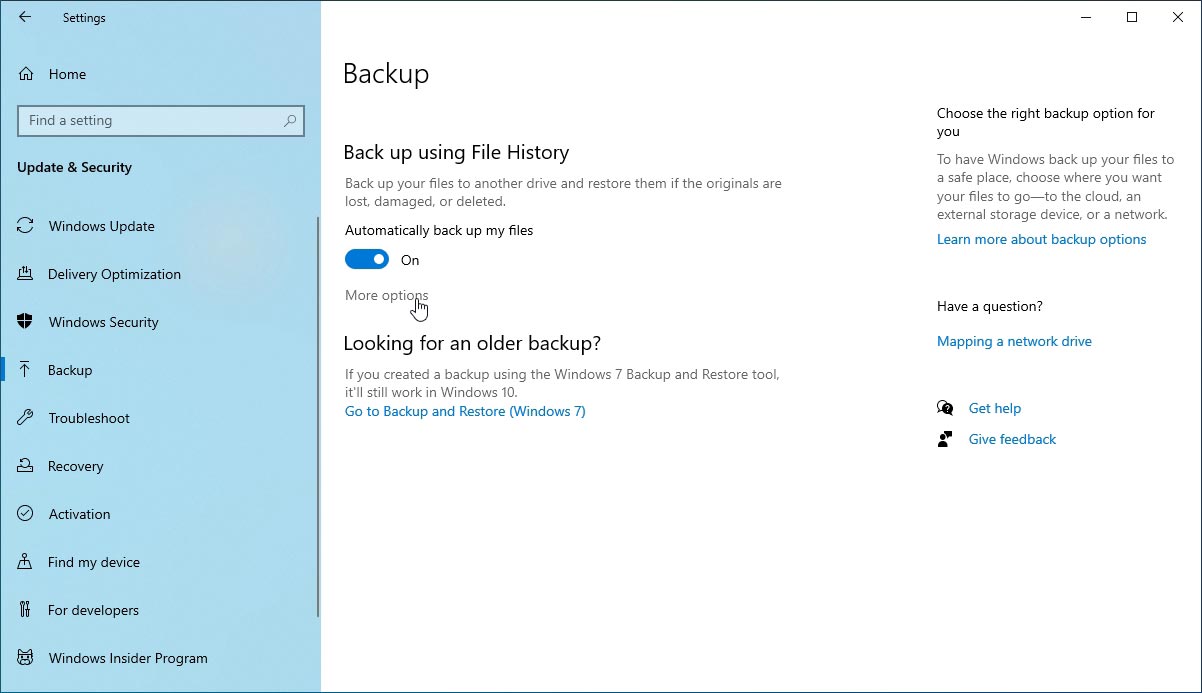
- Click on "Support now" if you are informed that "Your data is not yet backed upwardly" to create the first backup manually. Yous can also tweak the backup schedule from the drop-down menu underneath "Back upwardly my files". Nether "Go on my backups", a second drop-downwards carte du jour allows you to indirectly ascertain how much storage your backups will take by limiting their number. To include more folders in the backups, click on the "Add a folder" option, with a plus icon next to it, under "Back up these folders".
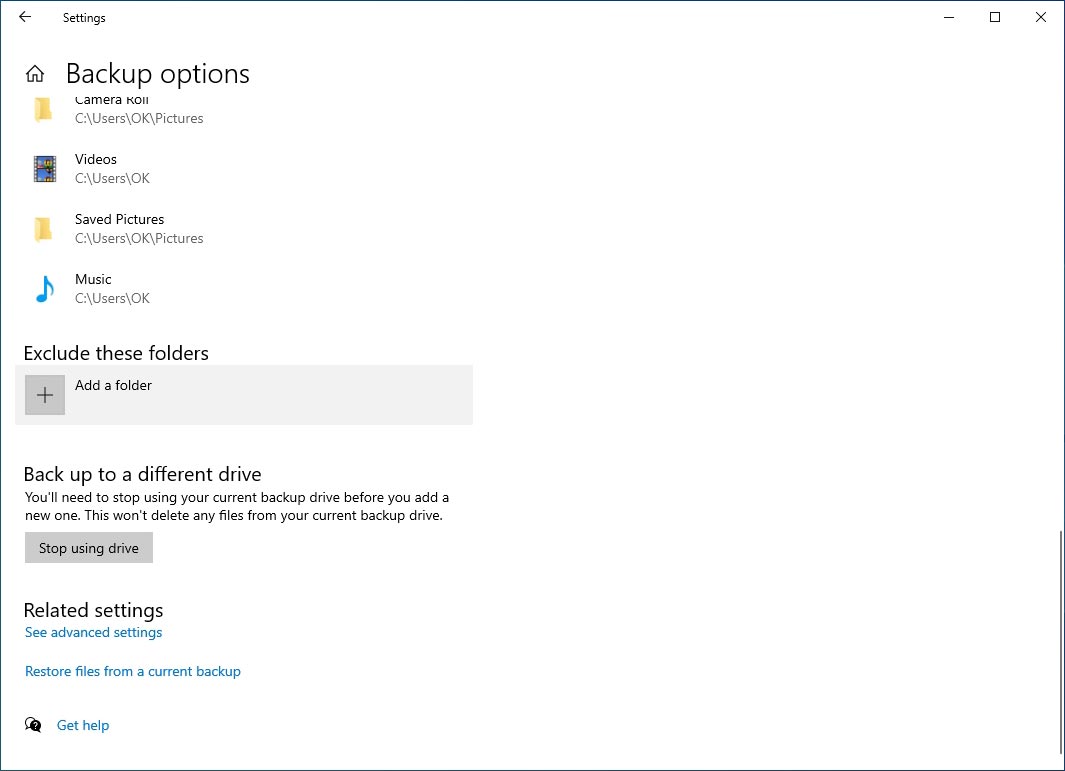
- If y'all scroll down beneath the folders list, you will find the option to exclude some folders from your backups. This is useful when you lot want a folder backed upwardly, but not some of its subfolders. Right below is the option to "Cease using drive", which will also stop File History from taking backups of your files in the futurity.
- You tin also access the contents of your File History backups directly from Windows Explorer. If yous right-click on a binder or file that's backed upwardly, you'll run across an option to "Restore previous versions". That'south a shortcut to the same window yous'd go if y'all right-clicked a file or folder, chose Properties, and then moved to the "Previous Versions" tab.
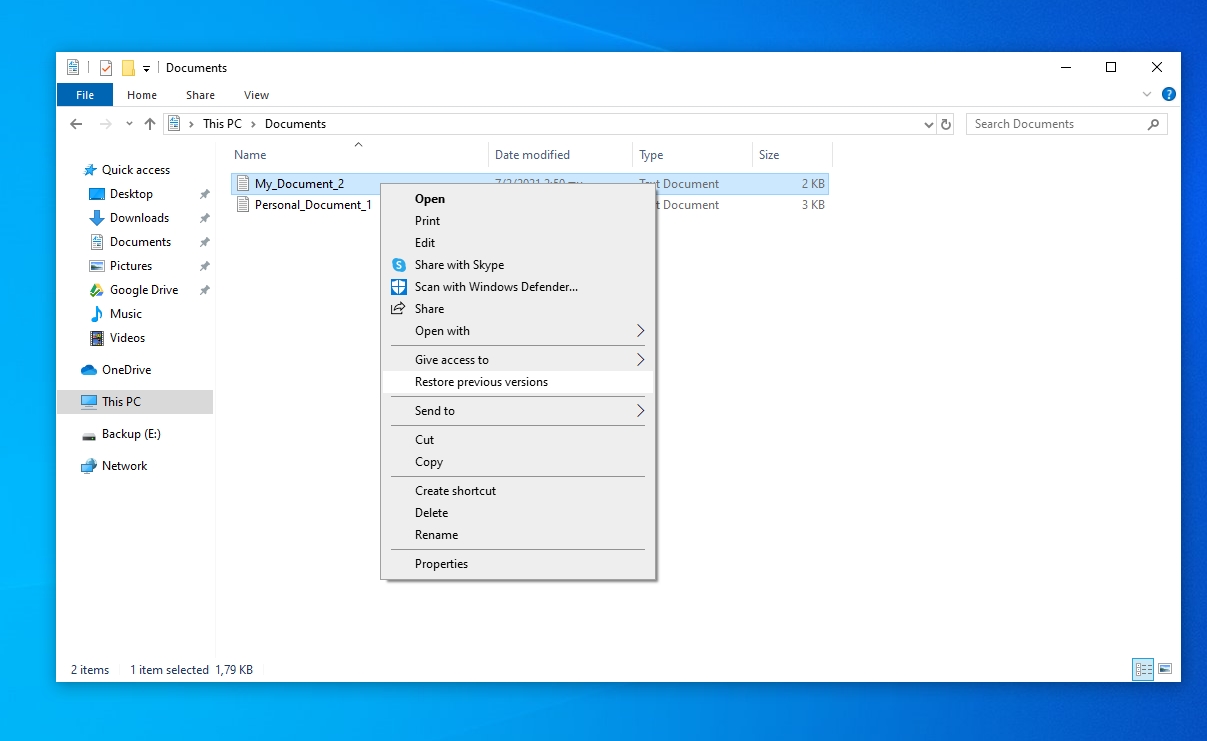
- From there, you can choose the version of the file or binder that you wish to restore. So, click on the "Restore" button on the bottom right to get it back. If you don't want to overwrite your current data, click on the down arrow on that push button's right and choose "Restore to…" instead. Then, select where yous want your files recovered. You can too directly open a previous version of a file using the "Open" push button instead.

File History is the new fashion of keeping your personal files secure with Windows ten. If y'all were used to how Windows vii did this or also want to keep backups of your whole operating system, that's nevertheless an choice, as we'll see right adjacent.
Method #vii: Recover Lost Files on Windows ten With Fill-in and Restore (Windows vii)
This championship makes more sense when you realize we are not talking about Windows vii itself. Instead, "Backup and Restore" is the name of another backup solution included in Windows 10, kept from the previous version of Microsoft'southward operating arrangement.
Different File History, Backup and Restore can also keep backups of the operating system. It'southward also closer to a classic backup solution: it doesn't present its backups equally a snapshot sequence, and you take to cull from where to restore your data manually.
As its name hints, to restore your files with Backup and Restore, yous start need to have them backed up.
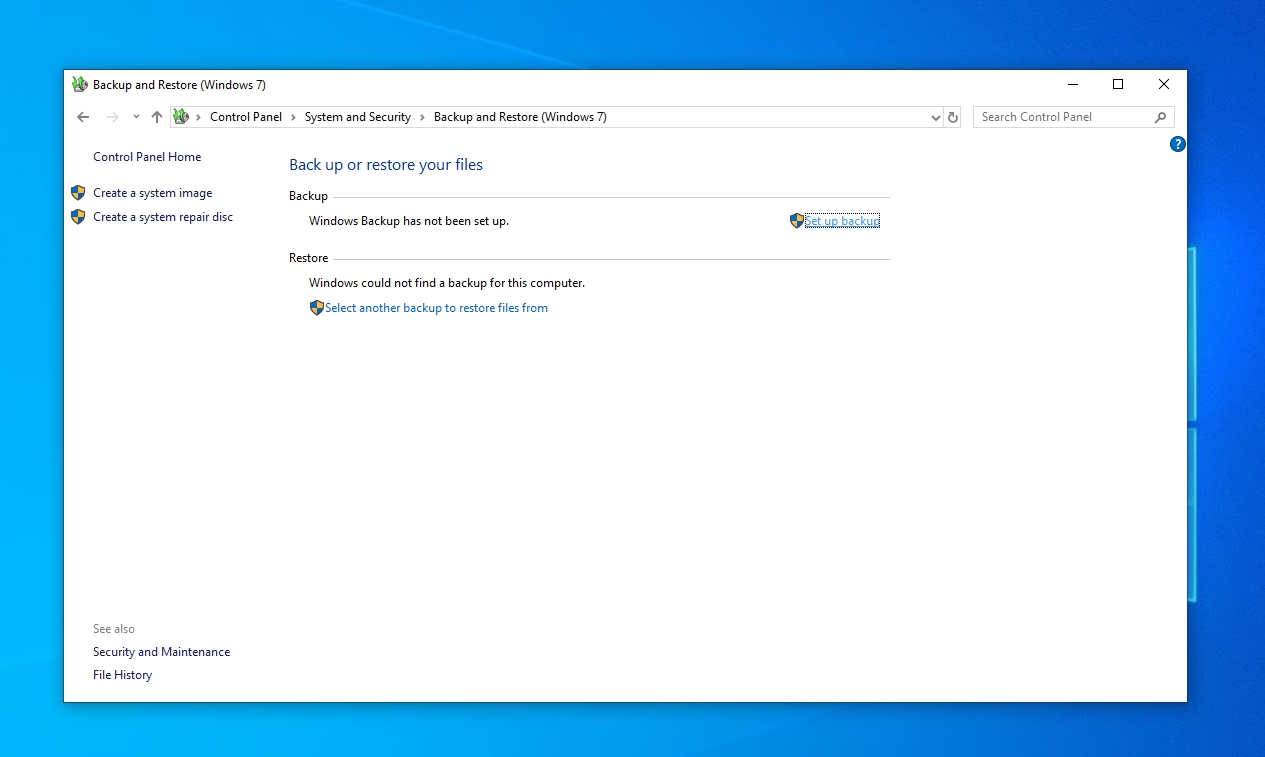
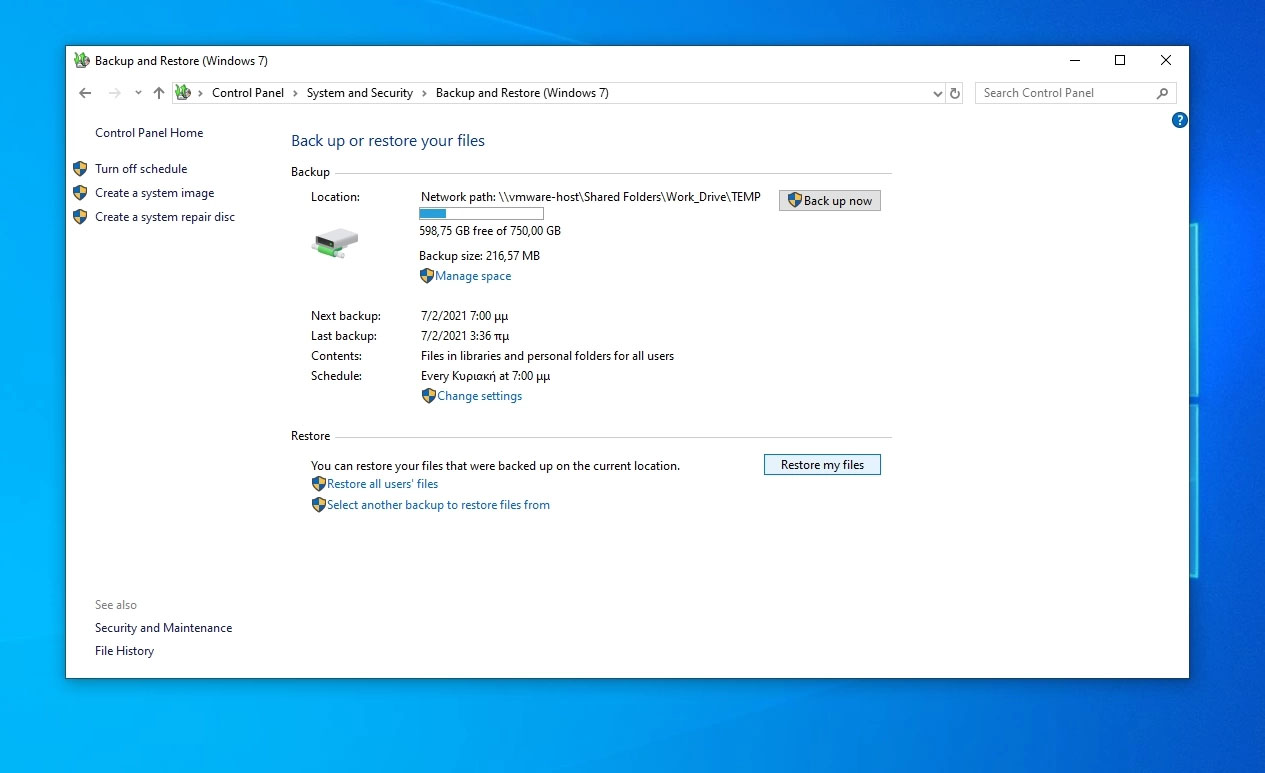
- Visit Windows 10's Control Panel. For a quick jump at that place, either press the start push or press the Windows fundamental on your keyboard and beginning typing its name. Then, choose it when it shows upward. From there, click on "Backup and Restore" under System and Security.
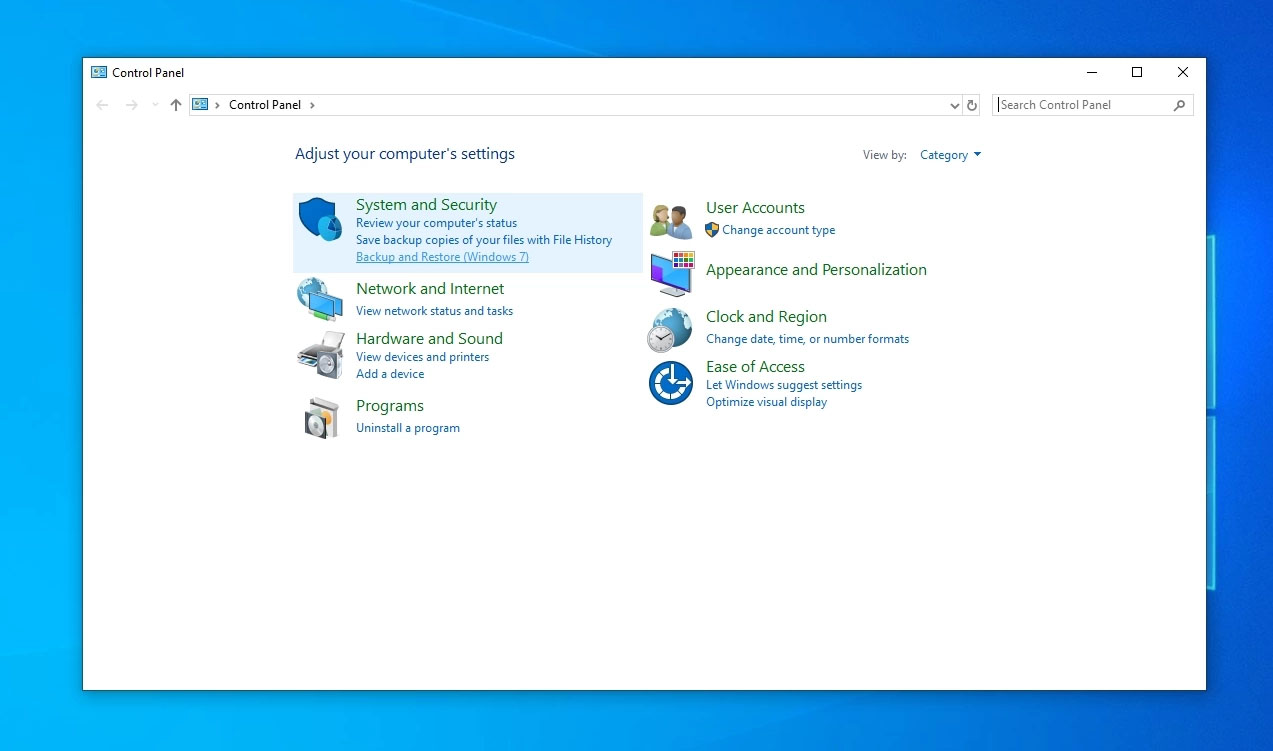
- Windows will inform you that "Windows Backup has non been prepare". Click on the "Set up backup" on the right.
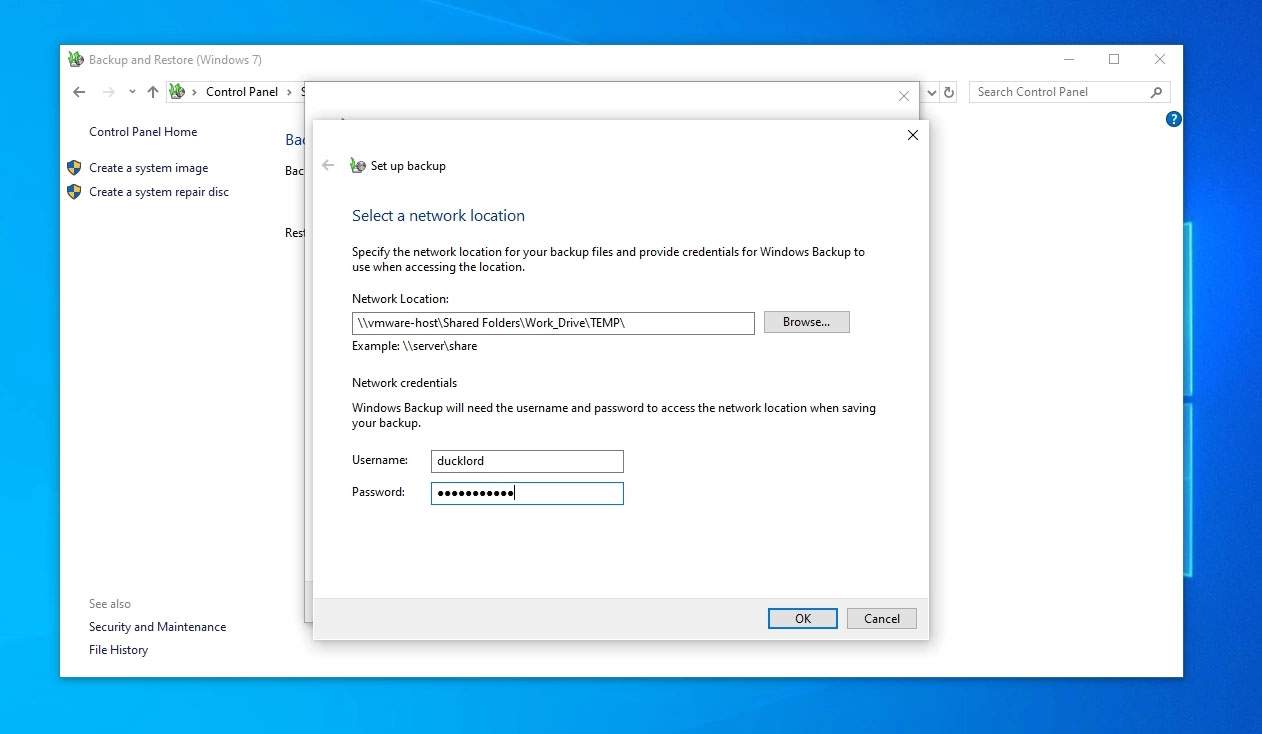
- Cull the bulldoze where you lot desire to save your backup. Like before, you lot should cull a secondary drive with plenty space or a network location. Keep in mind that bankroll upwards your whole operating system tin take up equally much infinite every bit its sectionalization, or even more. Then, click on Next.
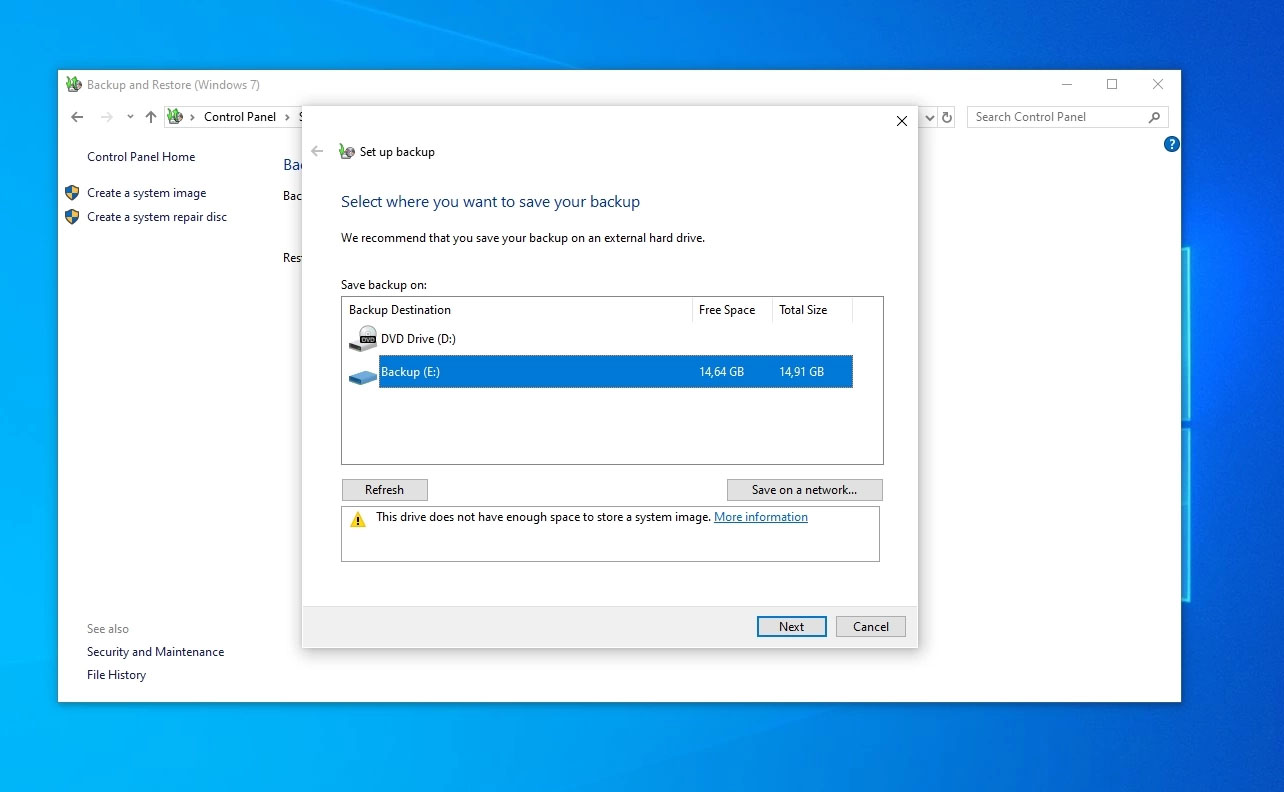
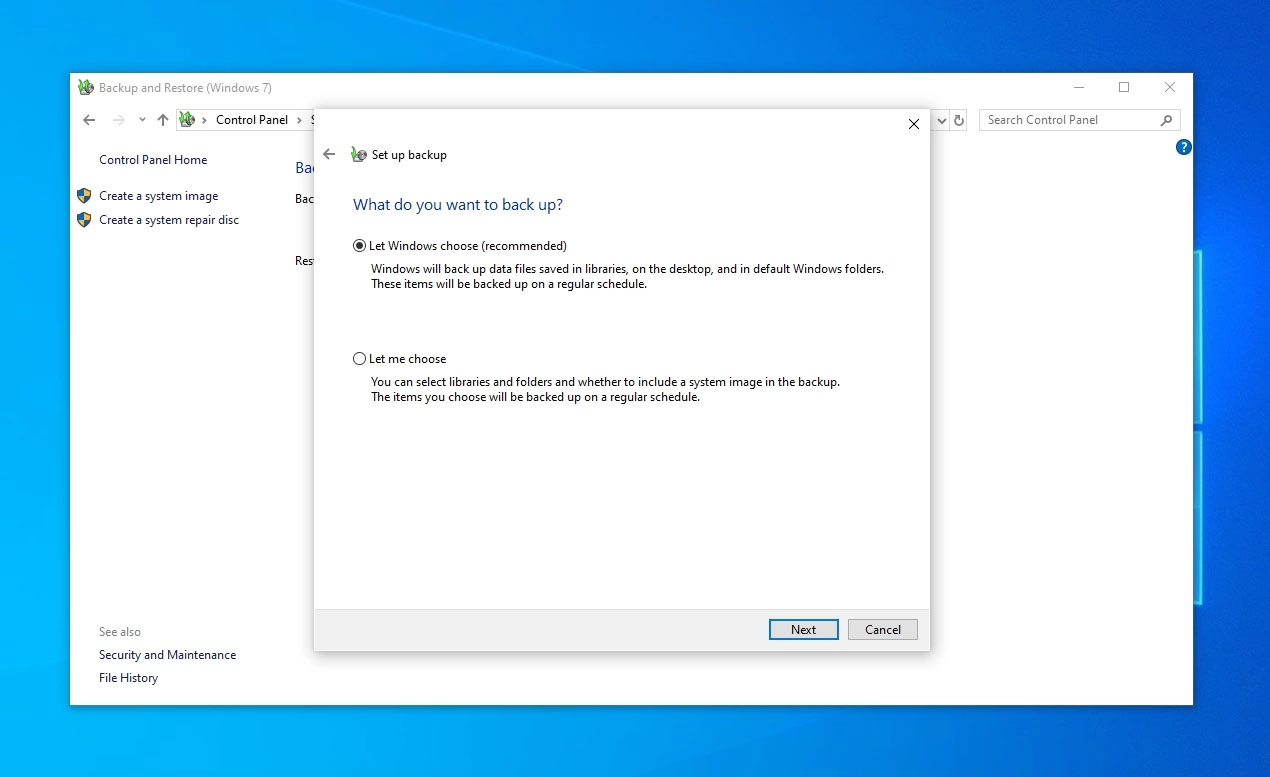
- At that place's a caveat with network locations: Windows might inform you lot that it can't save a organization image there, forcing you to select a local drive. You lot can cull what to back up. Your user account's library folders volition be preselected, to which you lot tin manually add folders from your computer'south storage devices.
- Depending on what y'all've decided to backup, the process can take a while. Even more then if yous chose to keep a system image, which means bankroll upward everything in the operating system'southward partition.
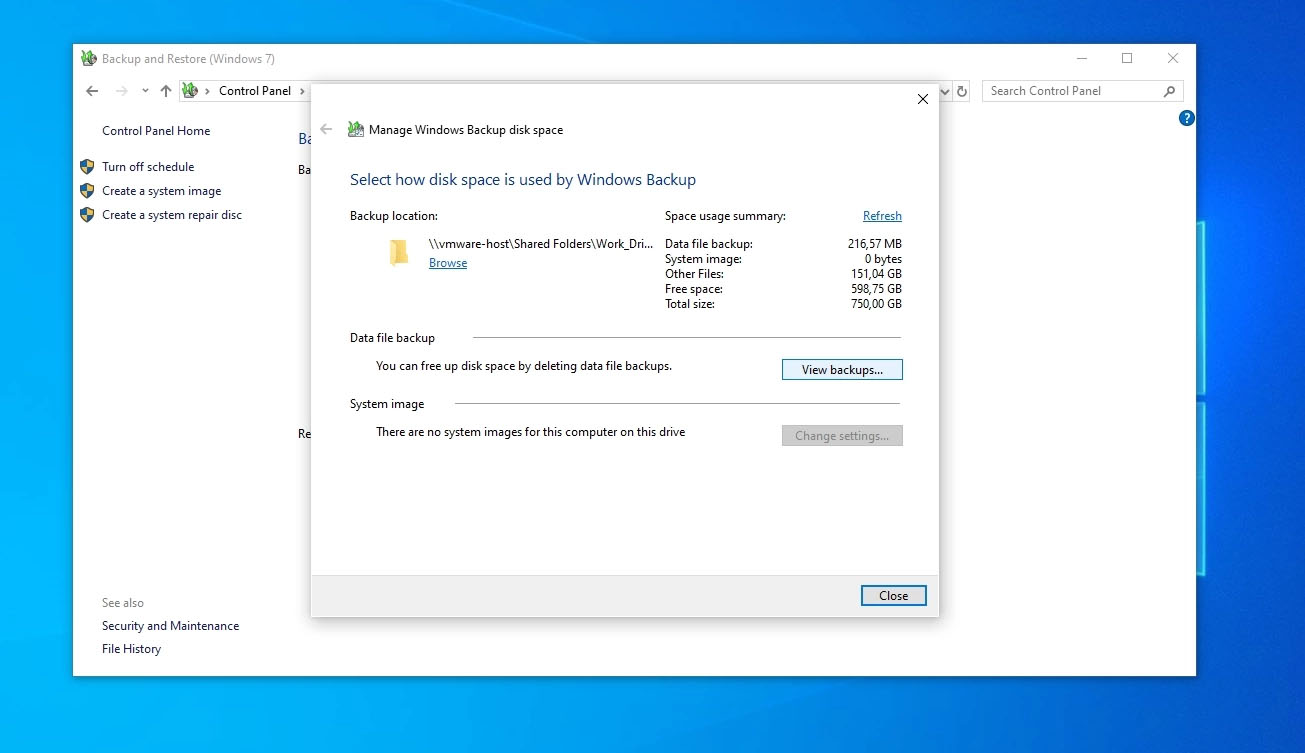
- Are you running out of storage space? Past clicking on "Manage space" so clicking on the "View backups…" push button, on the right of the new window that will popular up, you can check out the available backups and the space each of them eats upward from your storage. You tin can remove some of them to get back some storage space by selecting them and so clicking on the "Delete" button on the correct of their list.
- Ready to restore your files from those backups? Return to the "Backup and Restore" chief page. So, click on "Restore my files" on the bottom right.
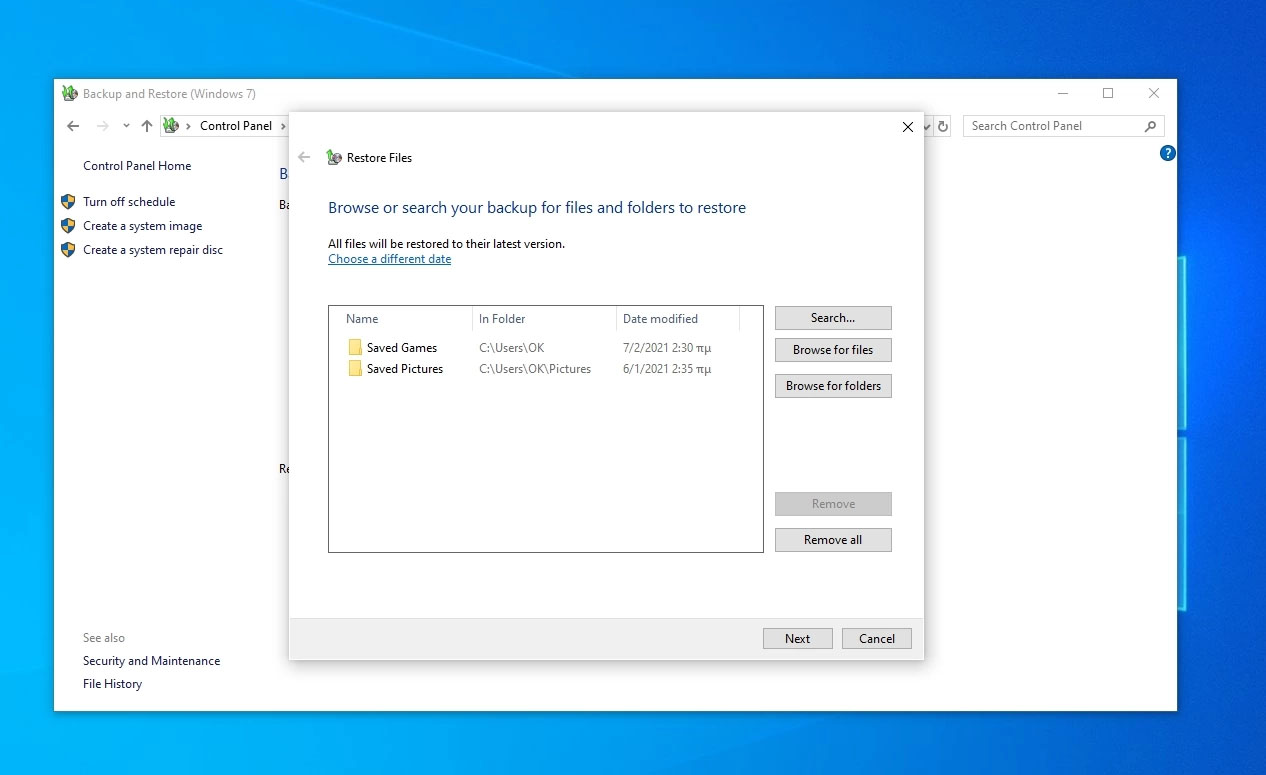
- You tin can choose from which backup y'all want to restore your files by clicking on "Cull a different date". You lot can also select the files and folders you lot want to recover using the "Search…", "Scan for files", and "Browse for folders" options on the correct. You tin add multiple entries to the Restore Files list.
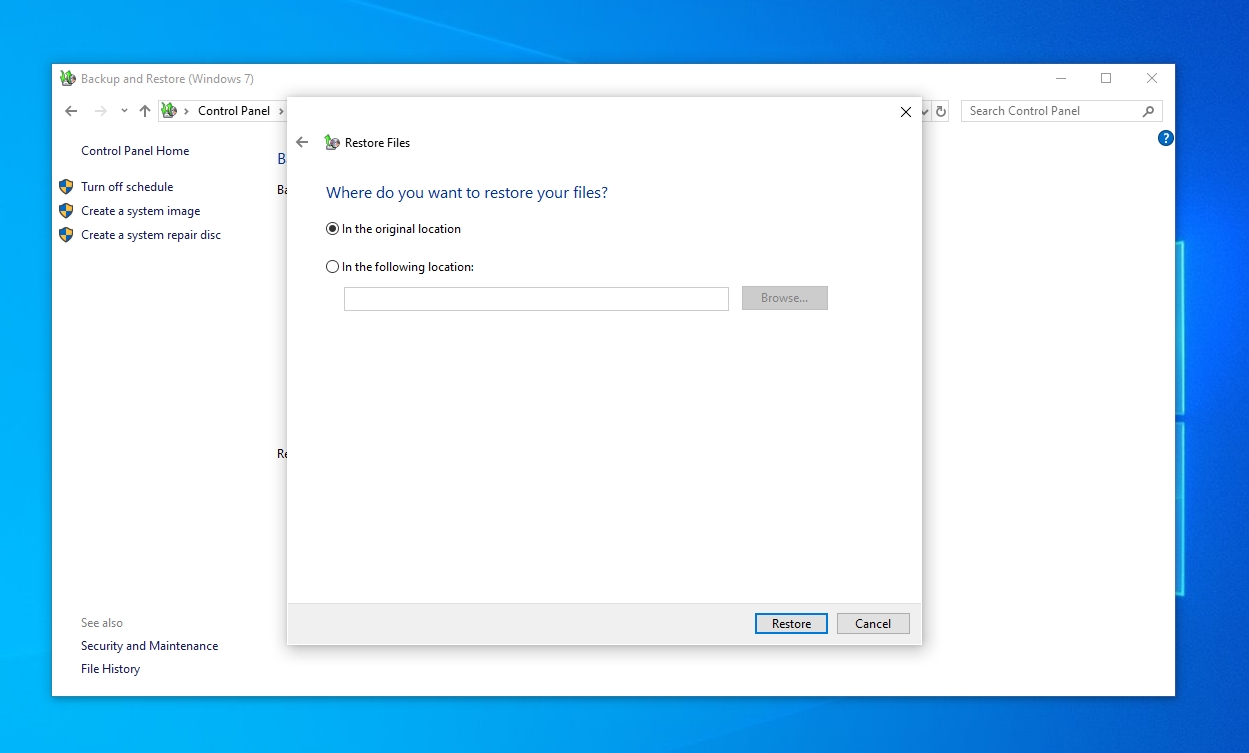
- The next step is choosing where you want to restore your files. Yous tin have them return to their original location or choose a different folder. Ane terminal click on the "Restore" button on the bottom right of the window, and shortly you will accept your files back.
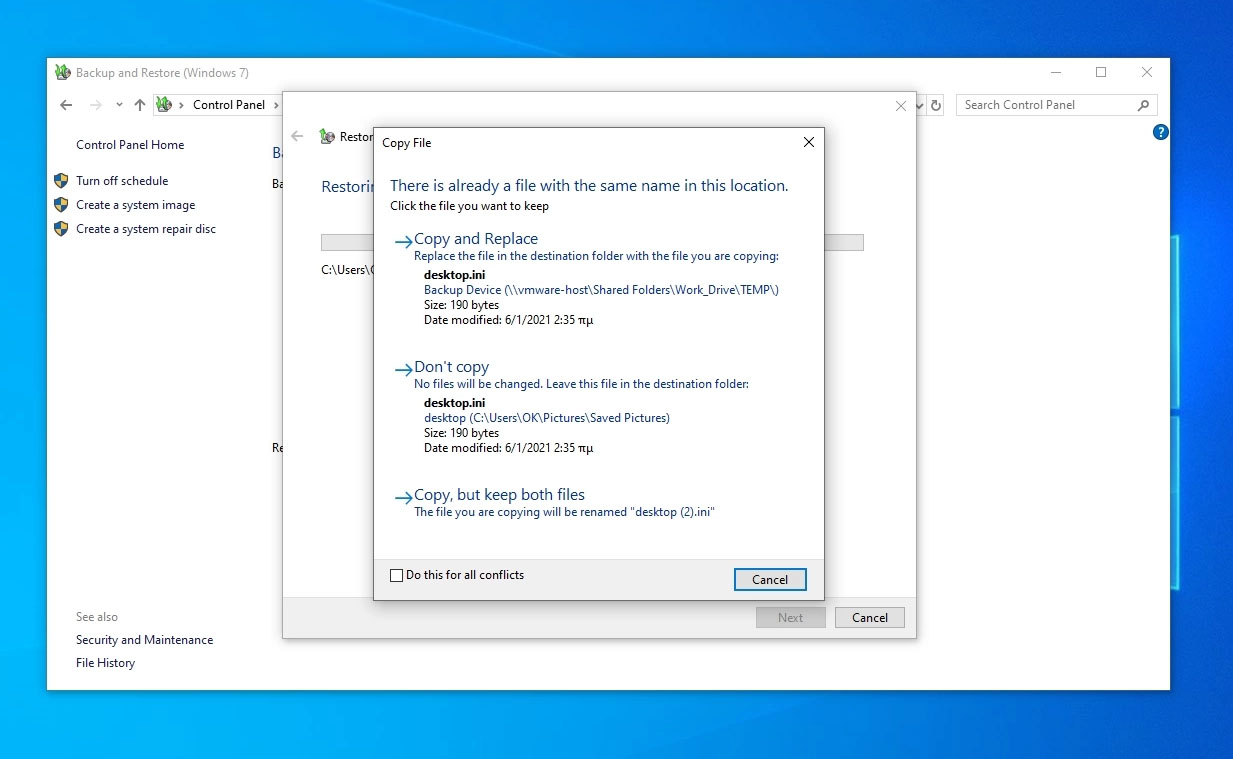
- If yous chose to recover your files to their original location, you will probably come across some conflicts. "Conflicts" every bit in files beingness recovered with the same name and to the aforementioned spot every bit existing ones. You tin can accept your recovered files supplant the current versions ("Copy and Supplant"), skip their recovery ("Don't copy"), or take them automatically renamed and proceed both instances ("Re-create, but proceed both files").
As nosotros will see correct side by side, if you take full system image backups frequently, yous don't besides have to back up your personal files individually. As long every bit a system image backup includes those files, even if the process is somewhat convoluted, yous tin can extract them manually.
Method #8: Extract Lost Files on Windows x From a System Image Backup
All the solutions we saw up to at present deal with individual files and folders, just what happens if you merely have a full system paradigm bachelor? In such a scenario, yous can "pull out" individual files and folders from it as follows:
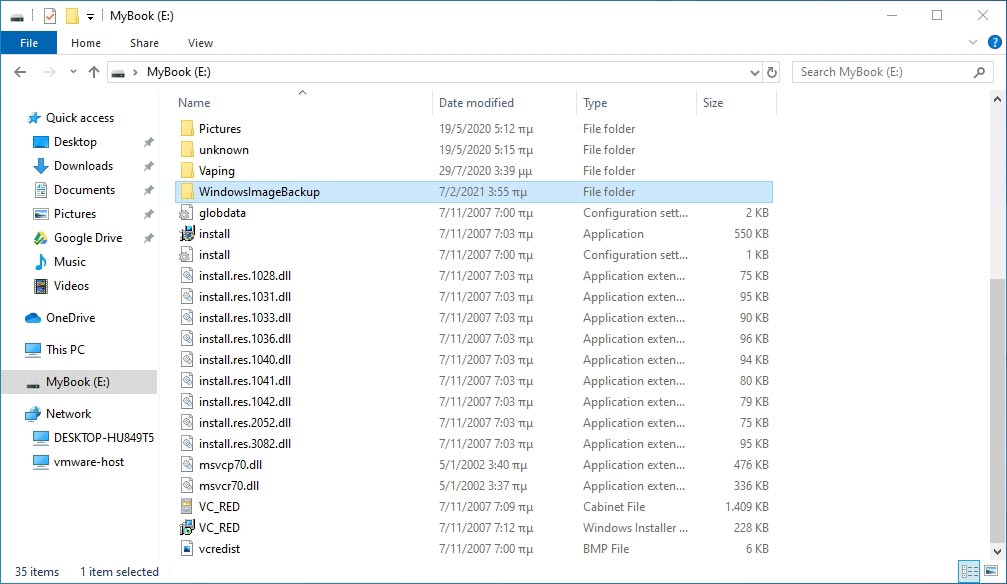
- Fire up your favorite file manager. For nigh people, this means Windows Explorer. So, point information technology to the location where your system image backups are stored. Enter the binder "WindowsImageBackup" that y'all will discover there.
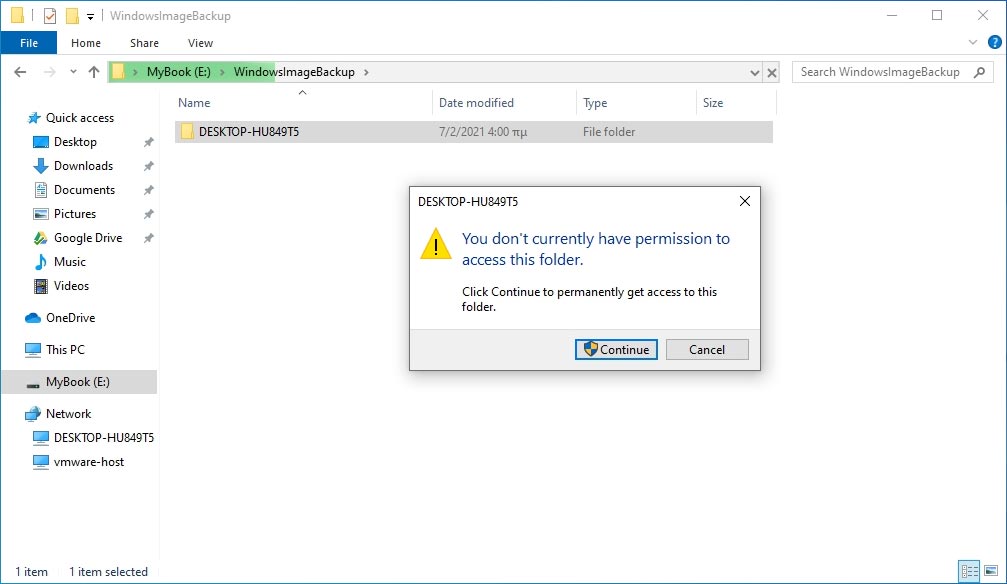
- Windows will bug you that you don't have permission to admission this binder. However, you tin can simply click on "Continue" to go on. Note that you will have to repeat this pace for every subfolder that yous are trying to access.
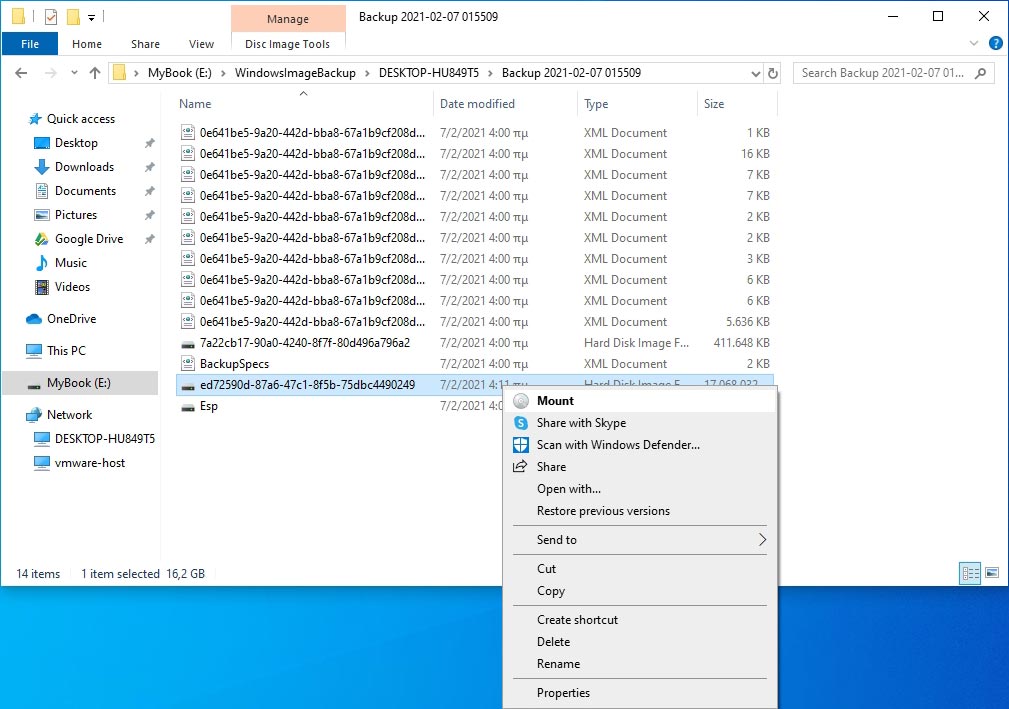
- Each arrangement image backup will be stored in a folder with its time and appointment. Within those, you will find multiple other files. Turn your attention towards the larger one, with a size shut to that of your full operating organization's division. Right-click on it and choose "Mount" from the menu that shows up. This backup's contents should at present be accessible from a new bulldoze letter of the alphabet, from Windows Explorer, like whatsoever other drive. If they're not, move to the side by side stride.
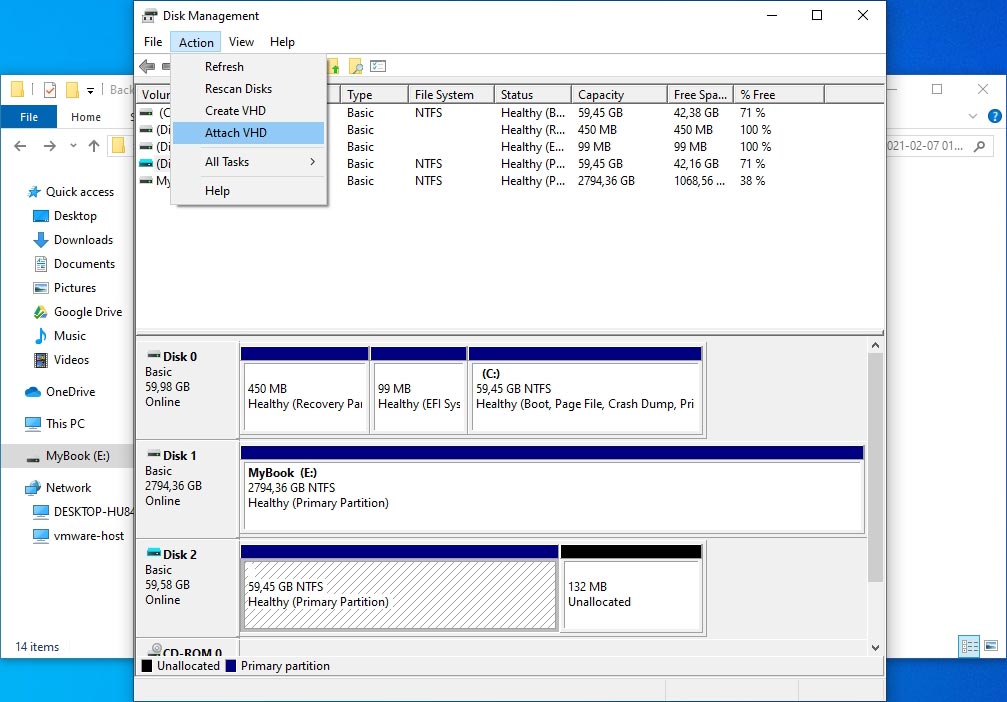
- Didn't the previous footstep give you lot access to the contents of your organization paradigm fill-in through Windows Explorer? Attempt a unlike approach for mounting the fill-in image. Click on the kickoff push or printing the Windows primal on your keyboard and beginning typing "Deejay Direction". Choose that entry when it shows up. From there, click on the second menu, "Activity", and choose "Attach VHD", and then your fill-in image.
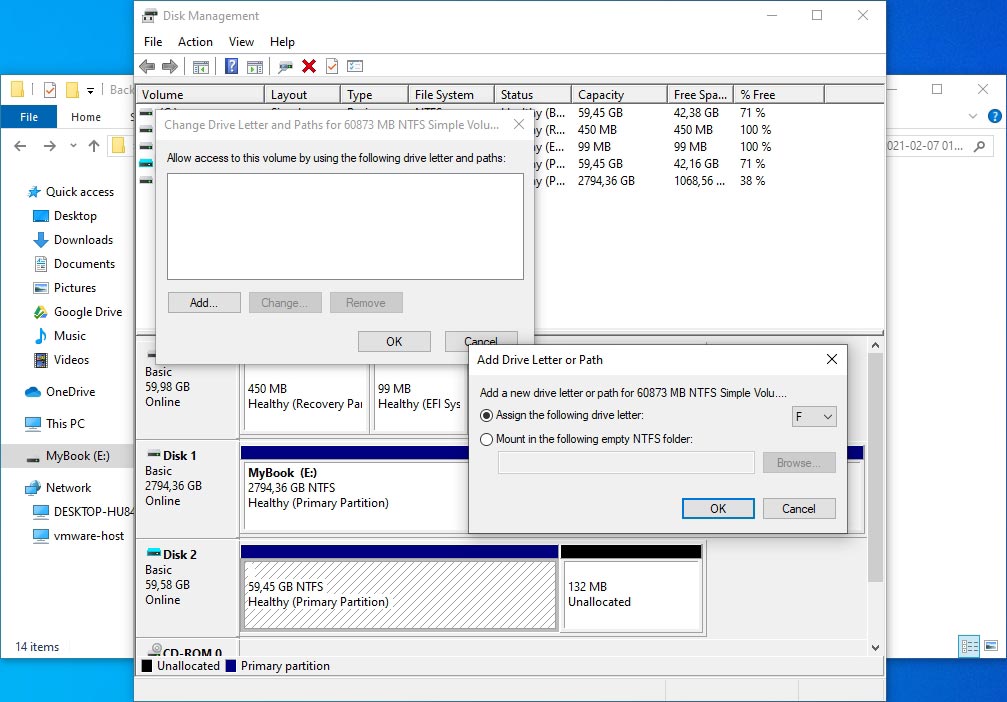
- The paradigm file you selected will show up as some other disk in Disk Management's lists. Right-click on information technology and cull "Change Bulldoze Alphabetic character and Paths…", then select a drive letter that y'all'd like to (temporarily) assign to that image file, from where you will have access to its contents.
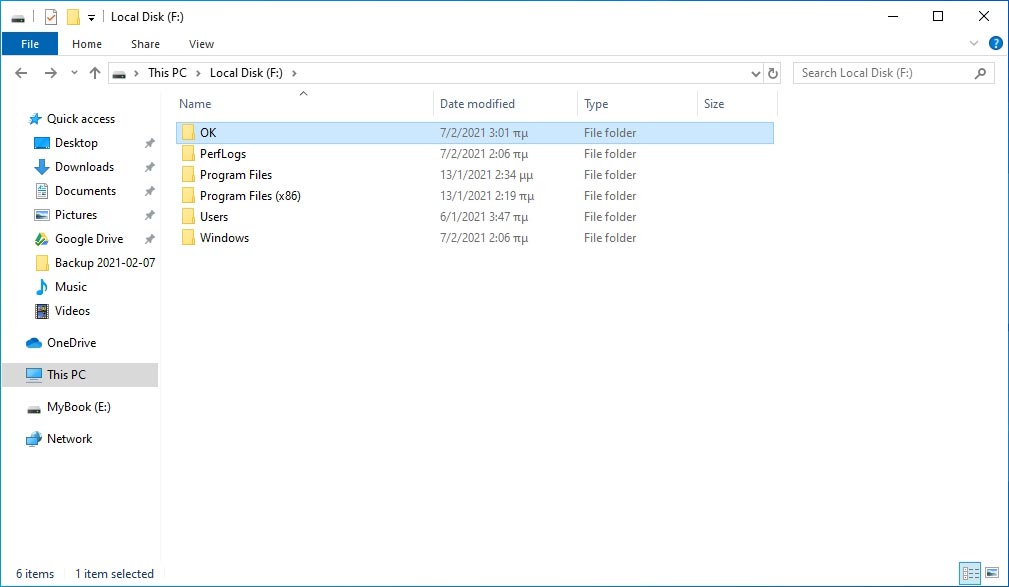
- Open up your favorite file manager and visit the drive letter assigned to your image file. Inside you'll find a clone of everything in your operating system's partition from when the backup was created. You can navigate into its subfolders, locate the files you lot'd like to recover, and copy them anywhere y'all wish.
Although other approaches are more straightforward for backing-upwardly and recovering your personal files, if you've never gear up ane up, existence able to pull your files out of a organisation image backup can be a lifesaver.
FAQ
The solutions nosotros covered are the all-time naught-cost solutions for recovering your files. There are alternatives, merely most of them more or less work in the aforementioned means and achieve the same results.
Two of the software tools we saw, Disk Drill and Windows File Recovery, can too check a storage device that appears empty after a format, and recover files that seemed all only lost. Indicate them towards the media from where y'all want to recover files, choose their thoroughest options, and requite them enough time to locate previous filesystem structures from where they might manage to fish out your files.
Proper recovery tools need direct access to your storage. That isn't possible through online apps for both technical and security reasons. The "technical" fleck is that this would demand the exchange of insanely huge amounts of data betwixt your computer and a remote server. The process would be wearisome, resource-intensive, and economically unfeasible. More importantly, though, yous'd be sending your whole storage device's contents to a third party. Would yous trust them with information ranging from notes and family photos to your browsing history and stored passwords? That'due south why if someone offers you a magical online solution for recovering your lost data with a single click, you should run the other way.
Be Prepared: The All-time Way to Deal With Lost Files on Windows 10 (and Whatsoever Other OS)
Unfortunately, the spider web is filled with misinformation on how to recover deleted files on Windows 10. Misinformation which can fifty-fifty lead to farther data loss. Thankfully, the solutions we saw tin can assist you recover all your lost files on Windows 10. They're tried, tested, and guaranteed to work.
Nevertheless, we'll echo that the all-time solution for such disasters is being prepared. When y'all eventually become your files back and have your operating system in club, brand sure to set up a backup solution if you hadn't already. And keep a recovery tool like Disk Drill, or Windows File Recovery installed and set. You never know when information technology will come in handy.
Source: https://www.handyrecovery.com/recover-deleted-files-in-windows-10/
Posted by: monroyafterely.blogspot.com
0 Response to "How To Restore Old Files On Windows 10"
Post a Comment